Requesting Access
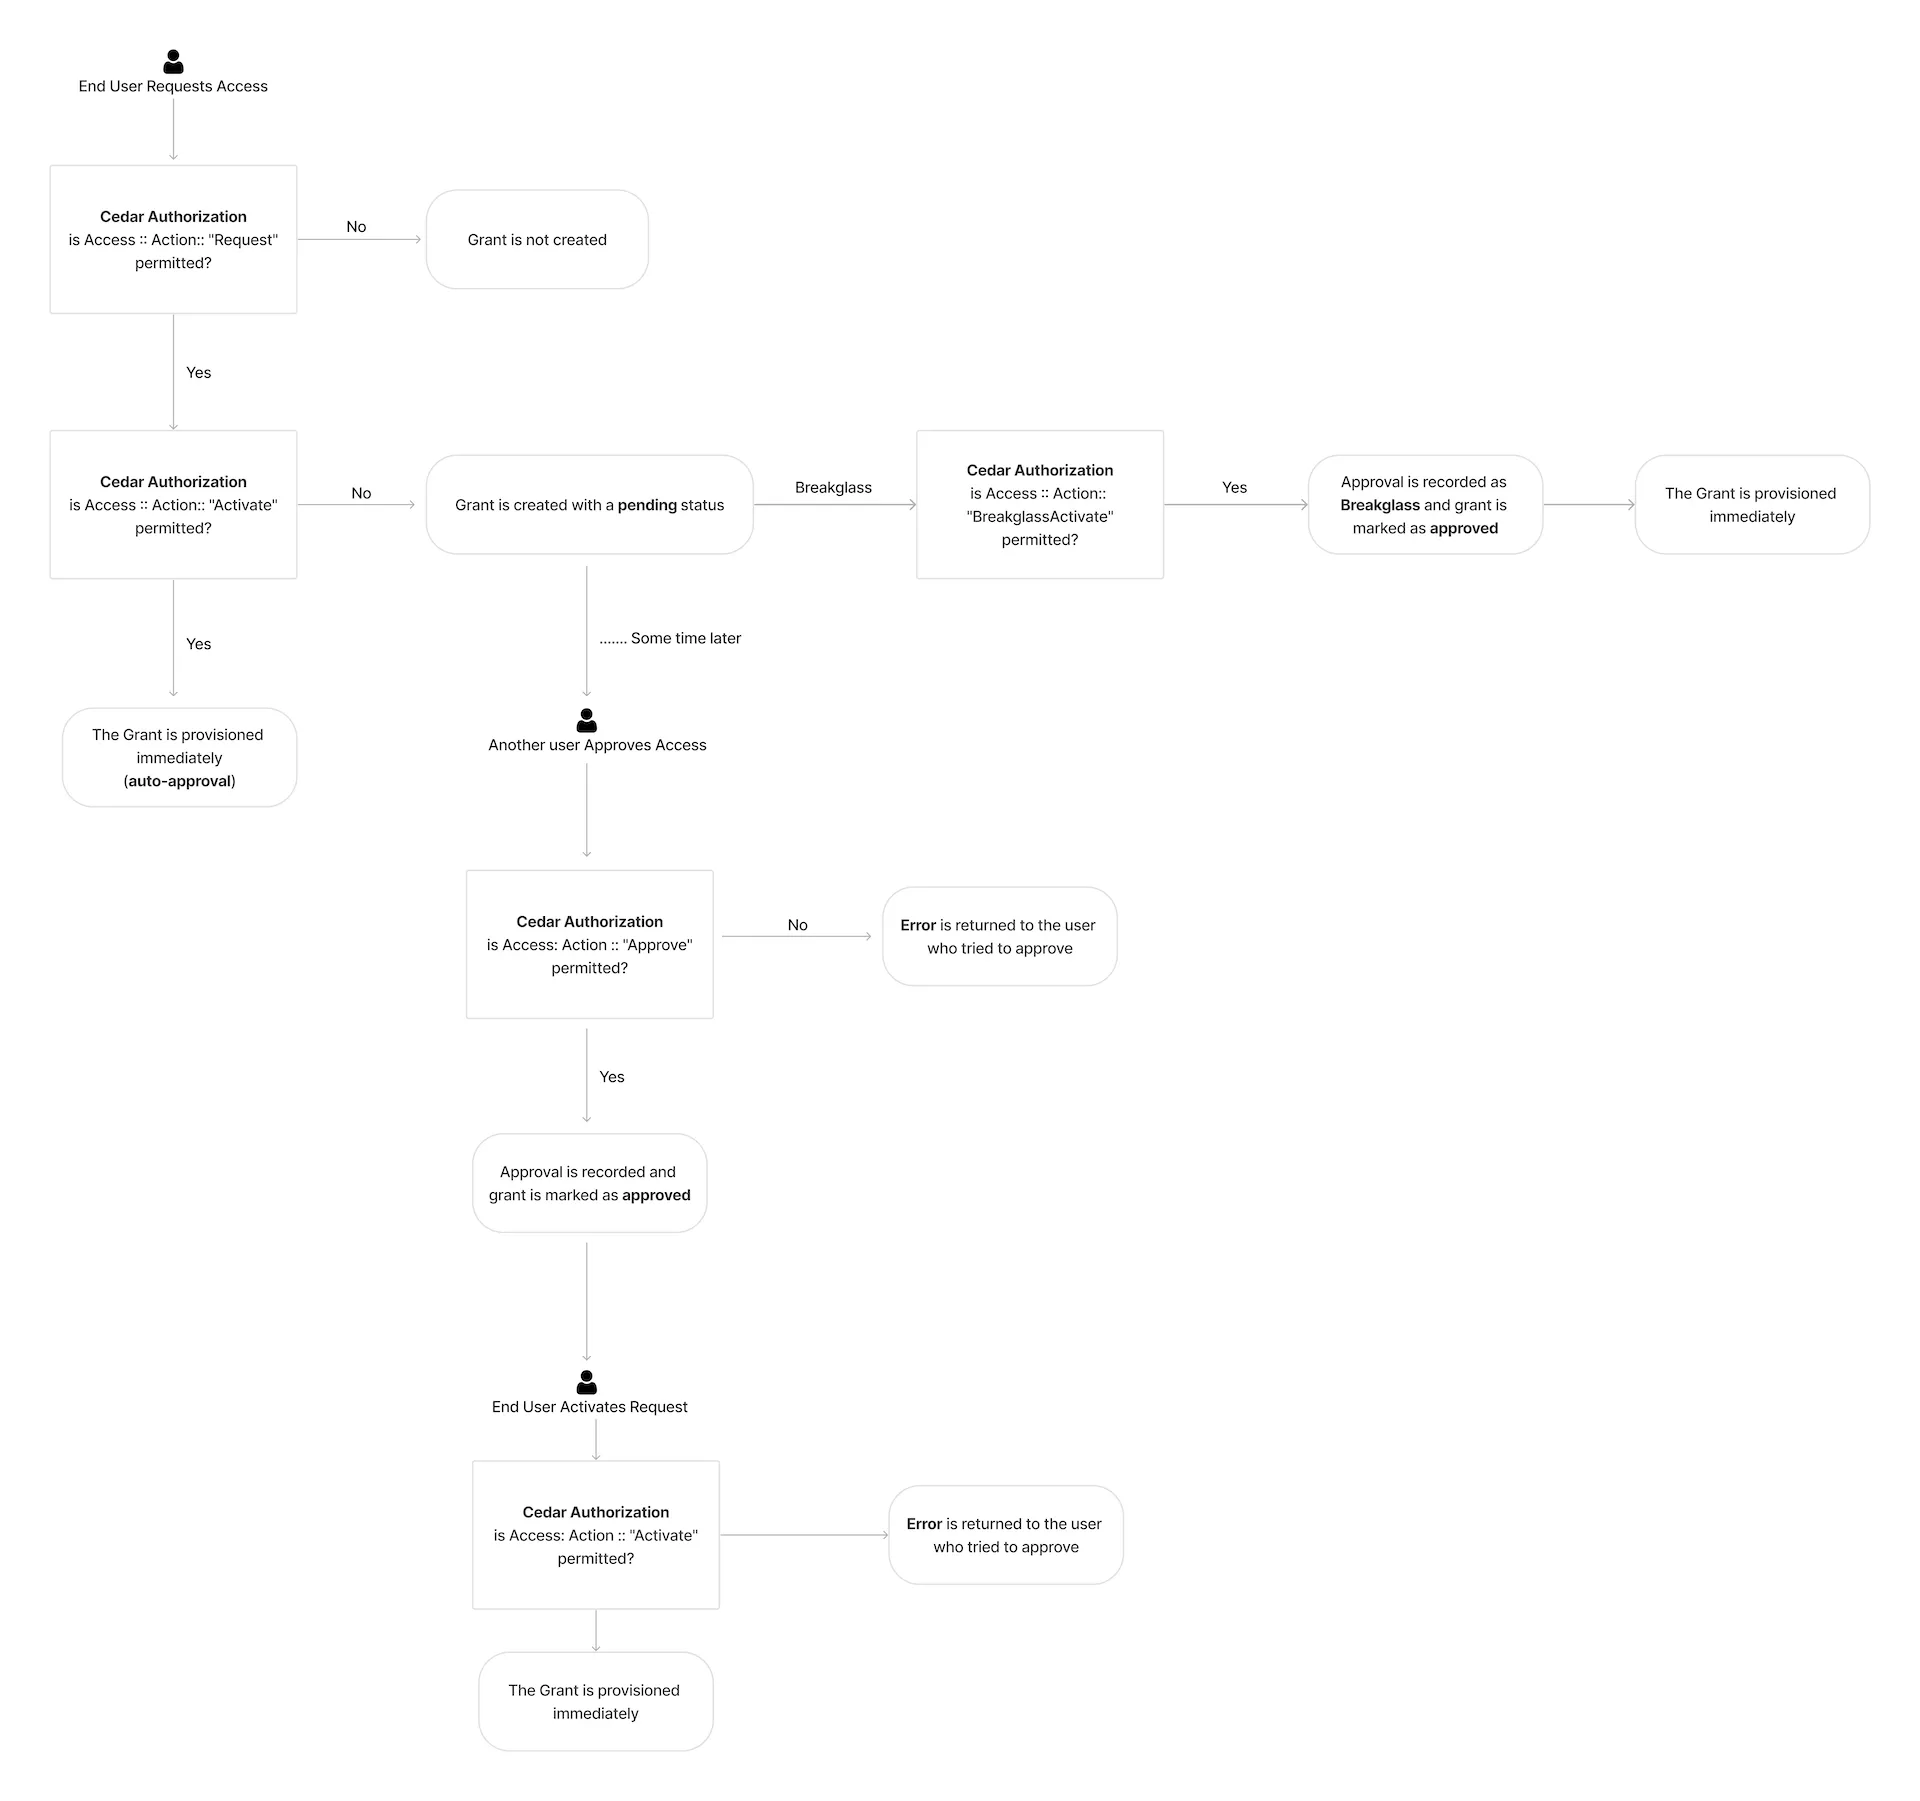
You can request access using the CLI or the web application. There is a notable change in the Grant lifecycle compared to our open-source framework. Previously, in Glide, approved requests would be activated immediately. However, in asynchronous working environments, this posed challenges. For instance, if you requested access for a specific timeframe and the account owner was in a different timezone, you might miss the window of access.
Common Fate uses a separate activation step after approval by the requestor. The following is the requesting access flow:
Using the CLI
List Available Roles
You can list the available entitlements with:
cf access list availableRequest Access
You can request access to entitlements with:
cf access ensure --target AWS::Account::00123456789 --role AWSAdministratorAccessMultiple --target and --role pairs can be specified to request access to multiple entitlements at once. If one entitlement needs approval and another is auto-approved, you’ll receive two Access Requests back. For example:
cf access ensure --target AWS::Account::00123456789 --role AWSAdministratorAccess --target GCP::Project::develop-123 --role EditorApprove Request
Approve a pending access request:
cf access approve request --id req_2bK5UuJ9po73tgGmVRFPQGCA6vEActivate Request
Re-run cf access ensure to activate access request:
cf access ensure --target GCP::Project::develop-123 --role EditorThe CLI indicates that access will be activated now. The user presses “Y” to confirm. Based on this, here are the meanings of the different states:
- GRANT_STATUS_UNSPECIFIED: This represents the GRPC unspecified value for the enum. It should never be returned under normal operations.
- GRANT_STATUS_PROVISIONING: Access is currently being provisioned.
- GRANT_STATUS_PENDING: A grant exists, but it’s not yet active. If you encounter GRANT_STATUS_PENDING after running
cf access ensure, manual review is required. Our CLI prints the request URL to stderr when run with the default output settings in this case. - GRANT_STATUS_ACTIVE: Access grant is active. If you see this status, you currently have access.
- GRANT_STATUS_CLOSED: This indicates a grant that is no longer active.
Close Request
Close a request that is no longer needed by:
cf access close request --id req_2bK5UuJ9po73tgGmVRFPQGCA6vEList Requests
List all access requests in your deployment with their details:
cf access list requestsFor JSON output, use the --output json flag with respective commands.
Using Slack
Request Access
Navigate to your designated slack access channel, type /access, and select the Common Fate app.
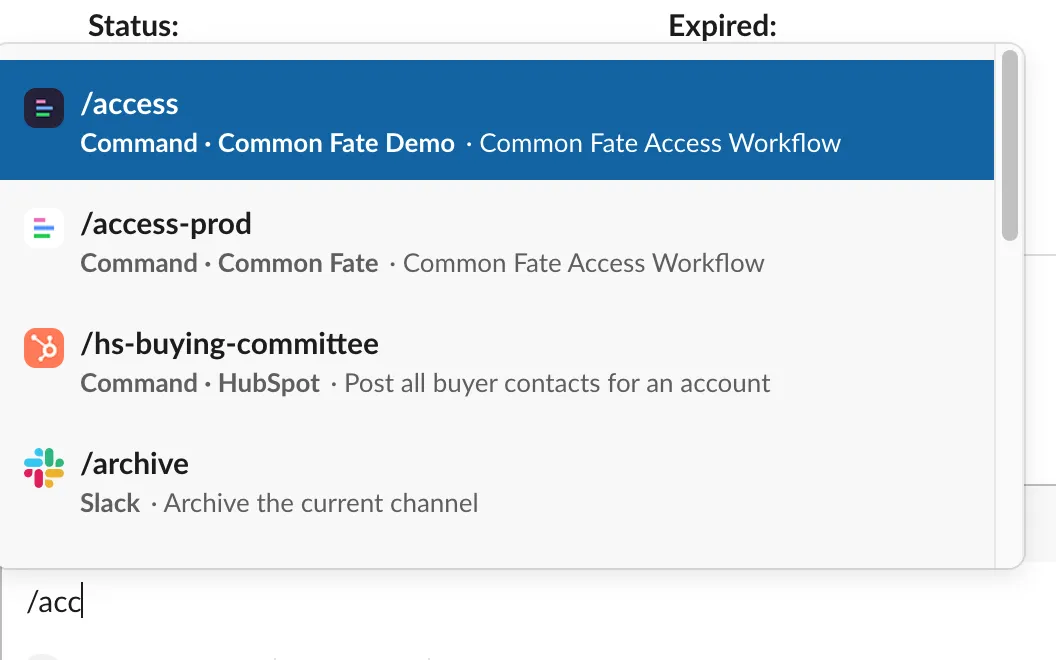
Press enter after typing /access and you will be navigated to a pop-up through which
you can select the resource type.
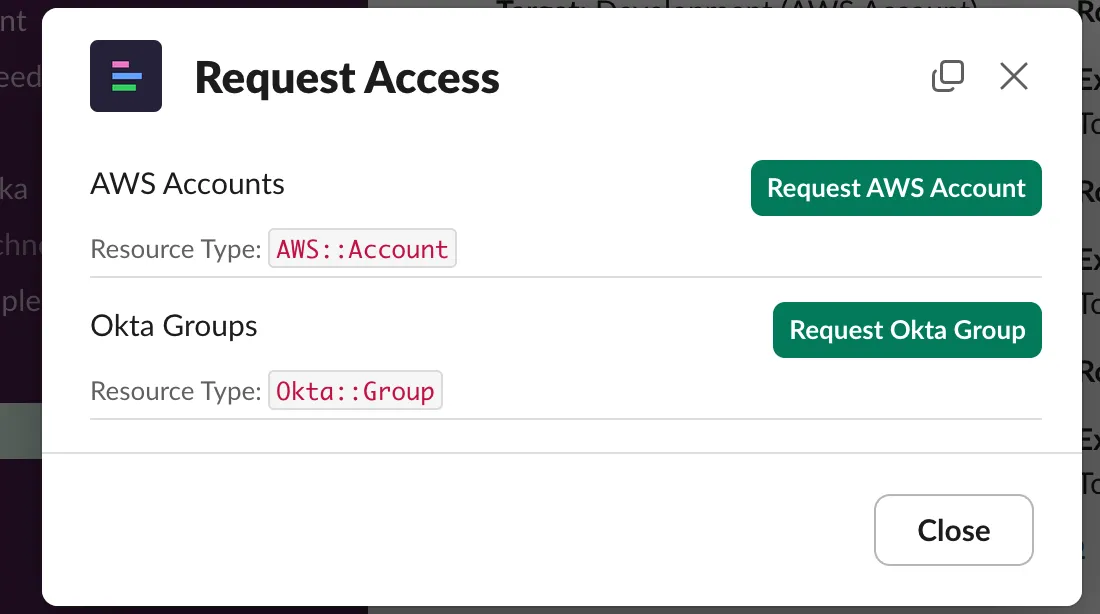
A request access form will appear. Follow these steps:
- Select the target resource.
- Choose the appropriate role.
- Provide a reason for your request.
- A dropdown menu will appear for the access duration. Select the appropriate duration.
- Click “Submit” to finalize your request.
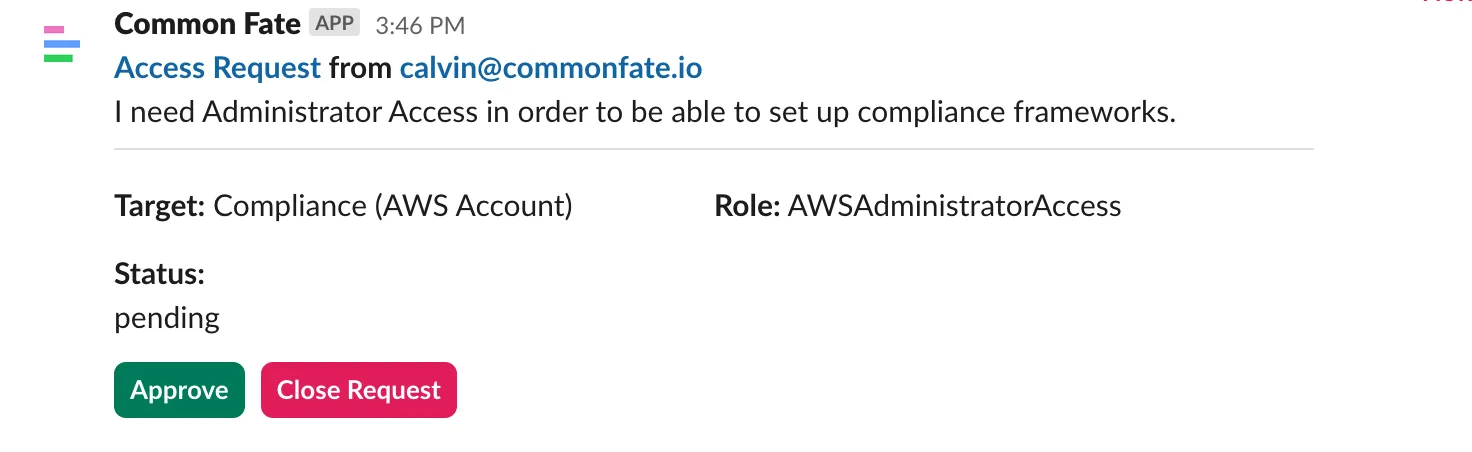
Approve Request
Click the “Approve” button to approve the request:
Activate Request
Activation of approved access requests can only be done through the web console.
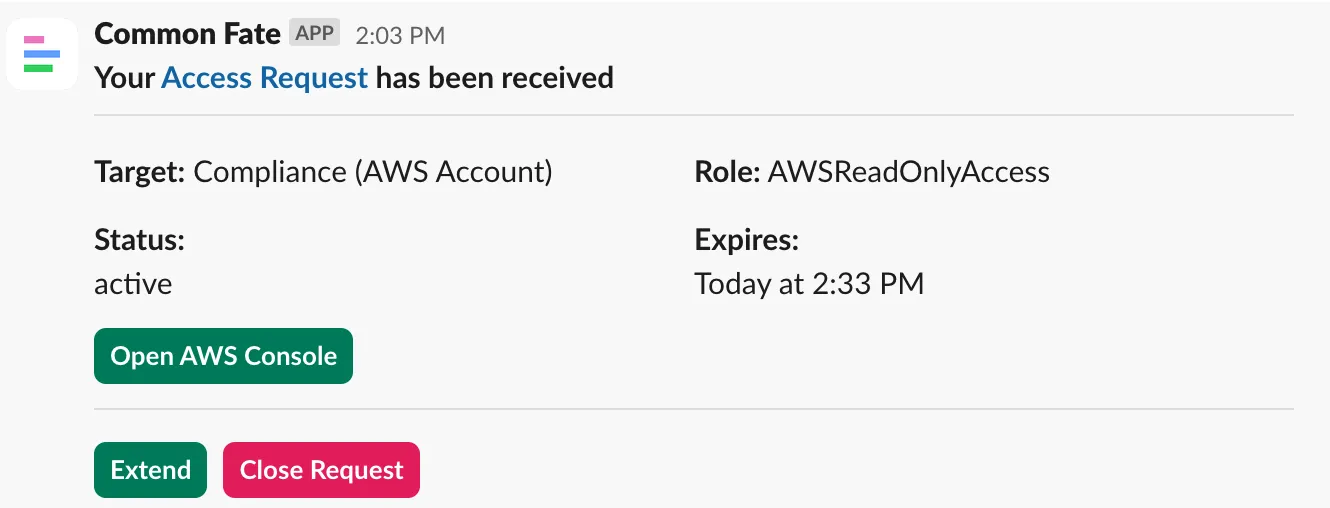
Extend Request
Once an access request has been activated, the Common Fate slack app will send you a direct message.
Click the “Extend” button to extend the request:
Close Request
Click the “Close” button to close the request:
Using the web console
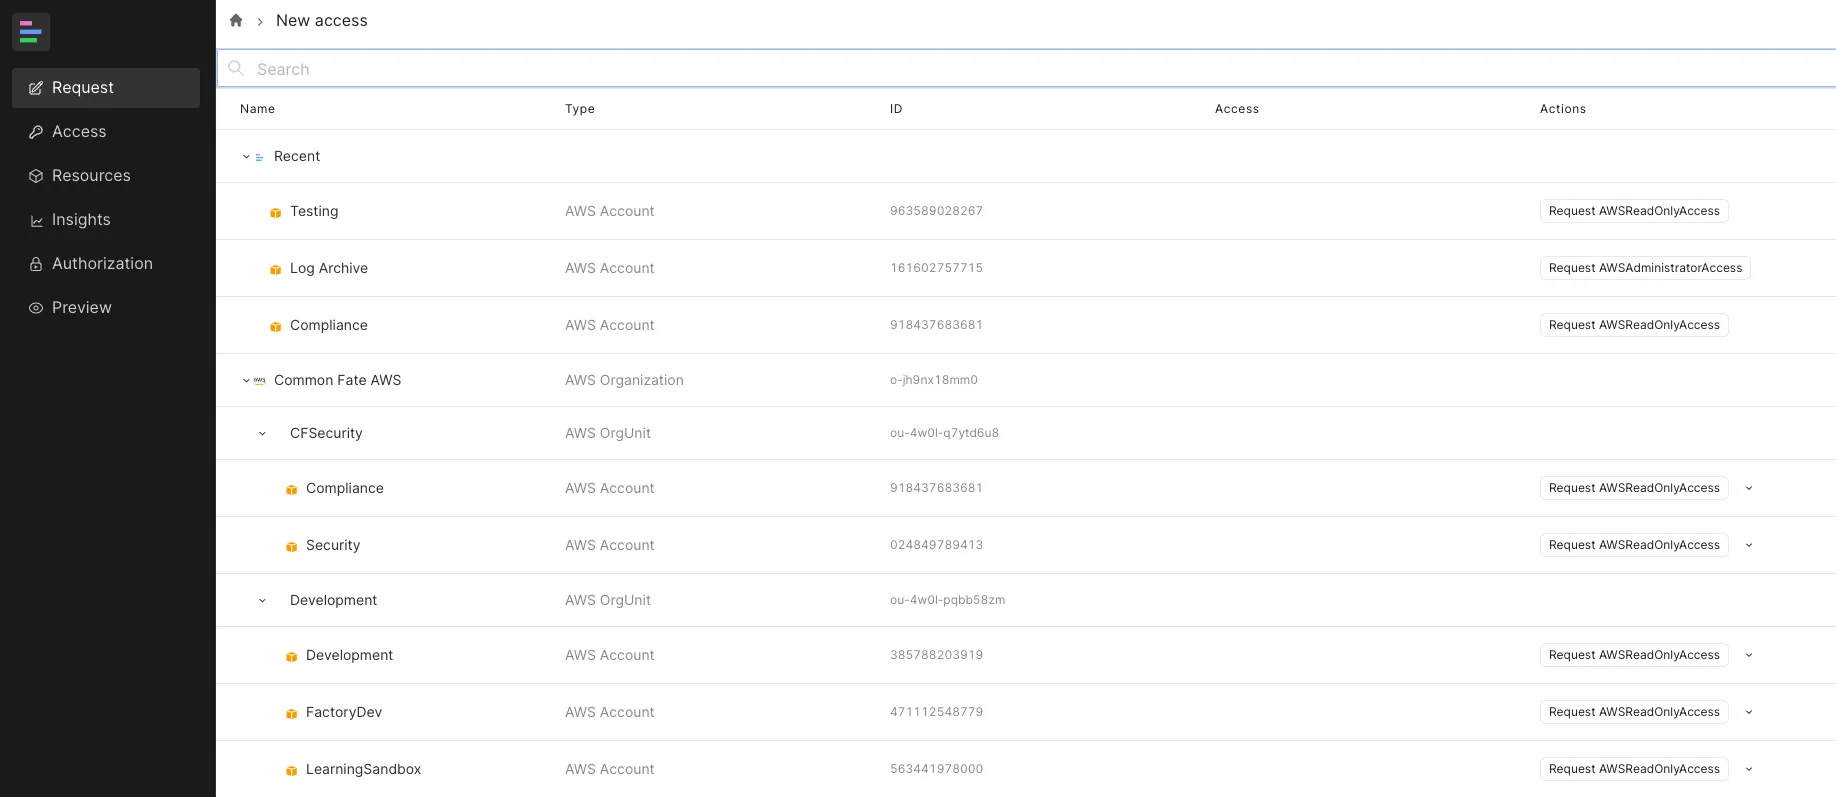
Request Access
-
Navigate to the “Request” tab in the sidebar. Search for and select the target:
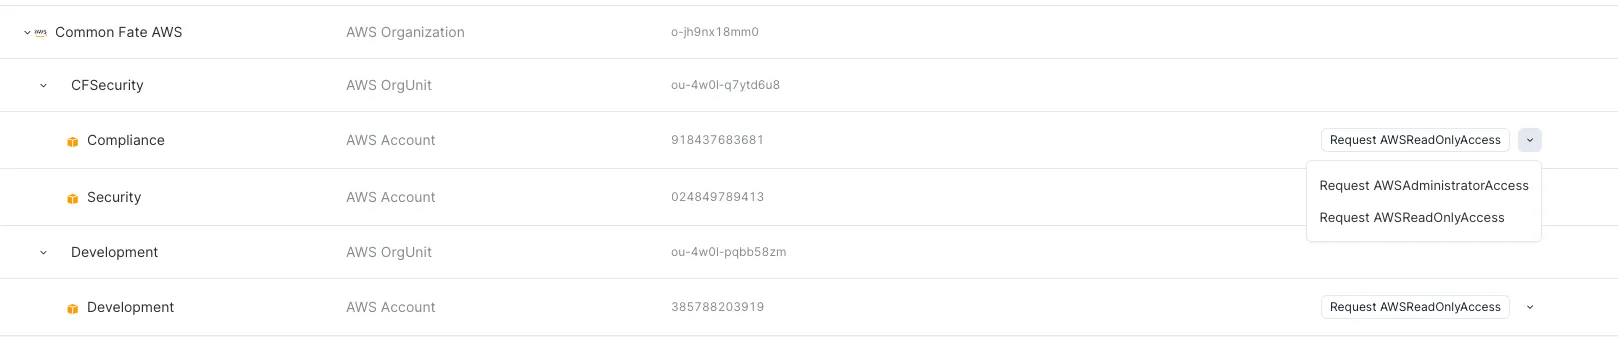
-
Select the desired role:
-
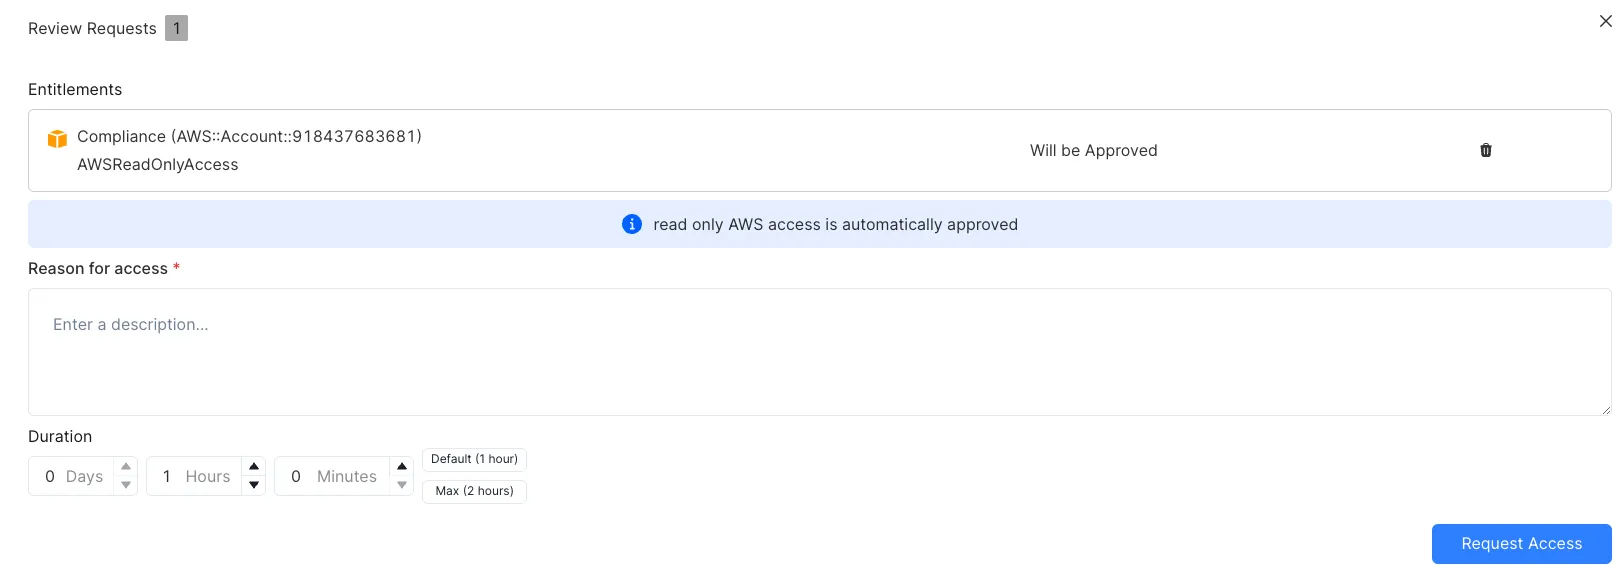
Review and provide the access reason. Click “Request Access”:
Approve Request
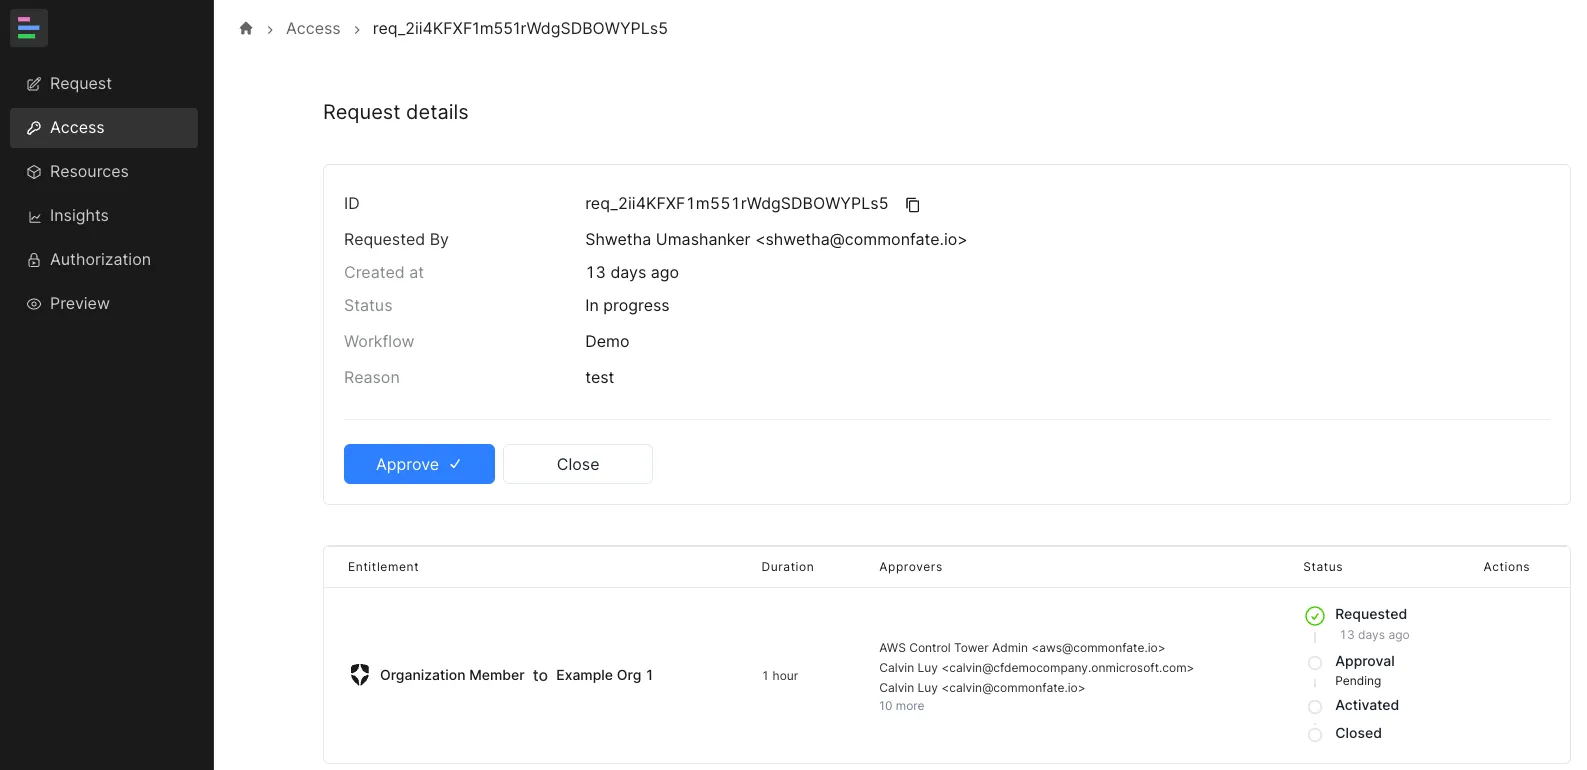
Navigate to the Access tab in the sidebar, locate the request, and click Approve:
Activate Request
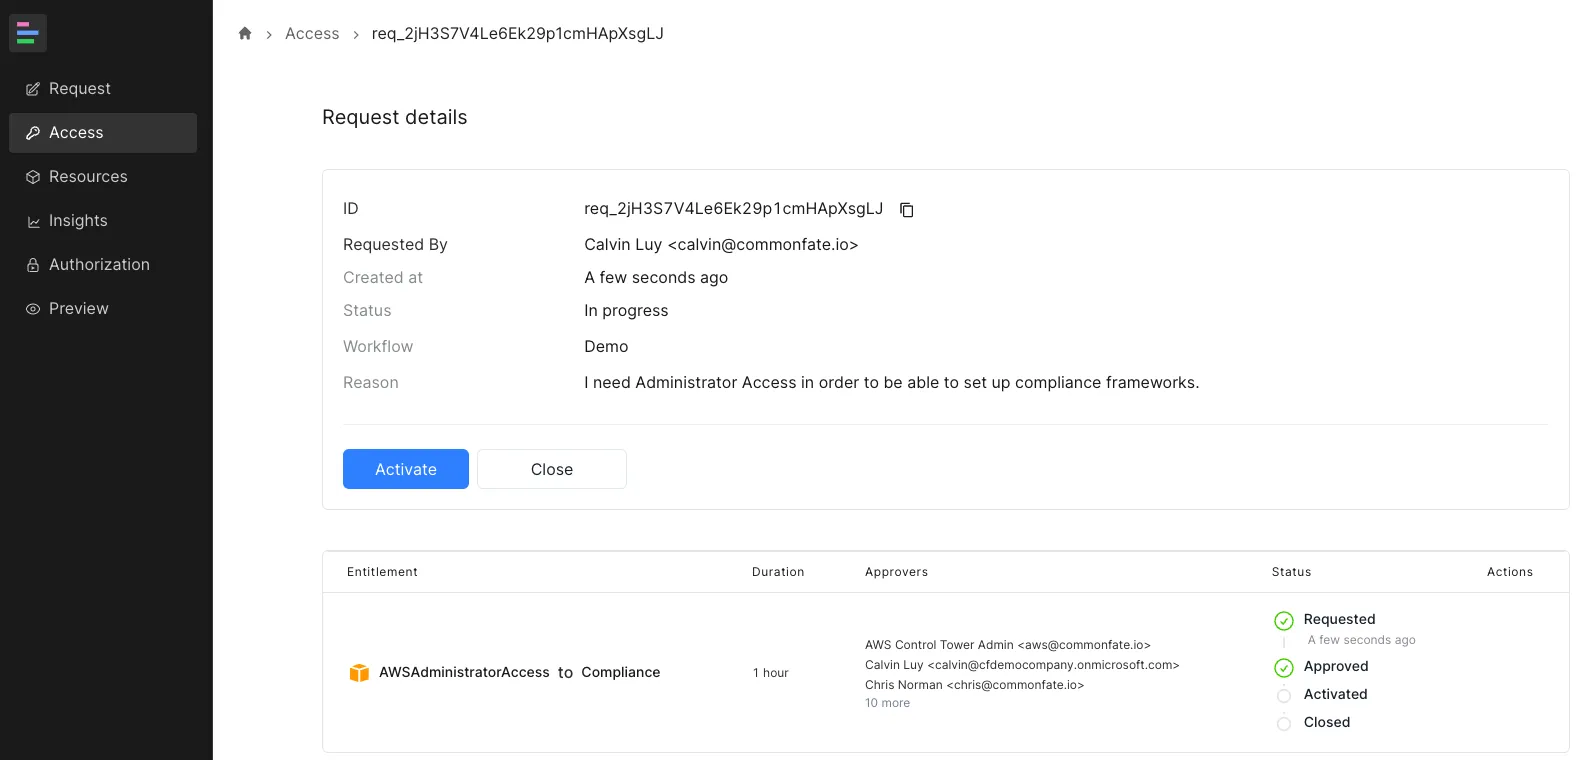
Navigate to the Access tab in the sidebar, locate the request, and click Activate:
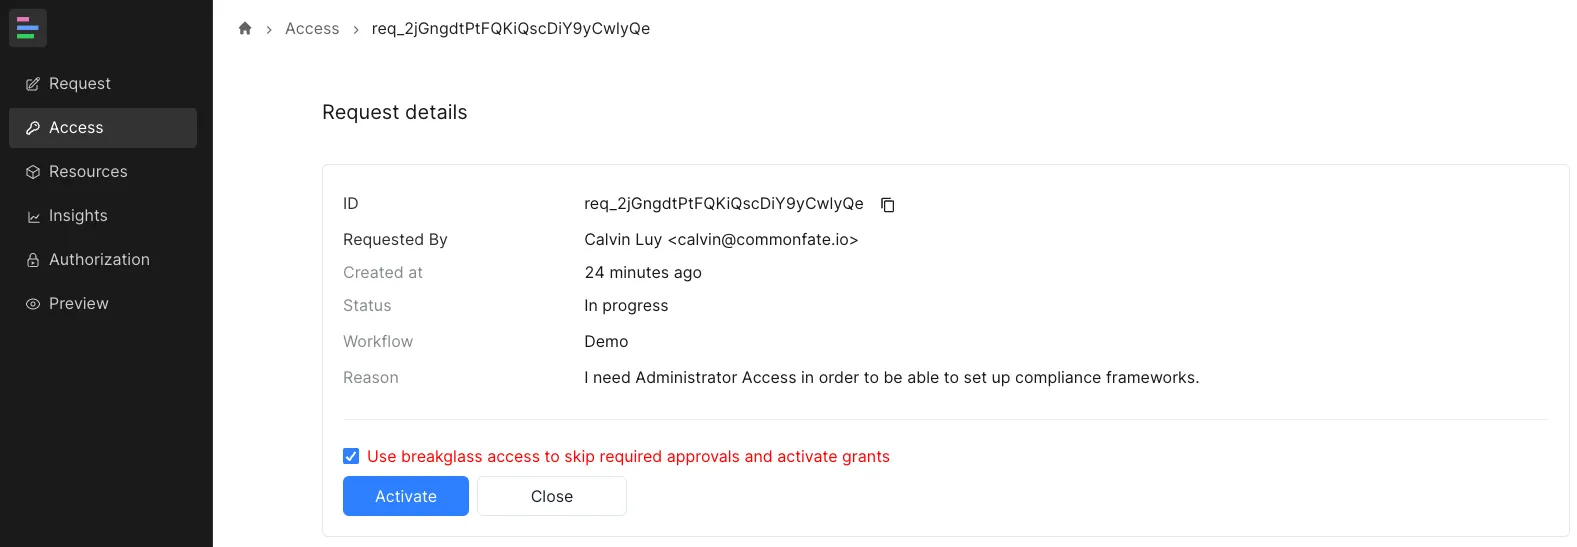
If breakglass access is enabled, you can activate it by checking the confirmation box. Once confirmed, click the “Activate” button to proceed:
Extend Request
Navigate to the Access tab in the sidebar, locate the request, and click Extend:
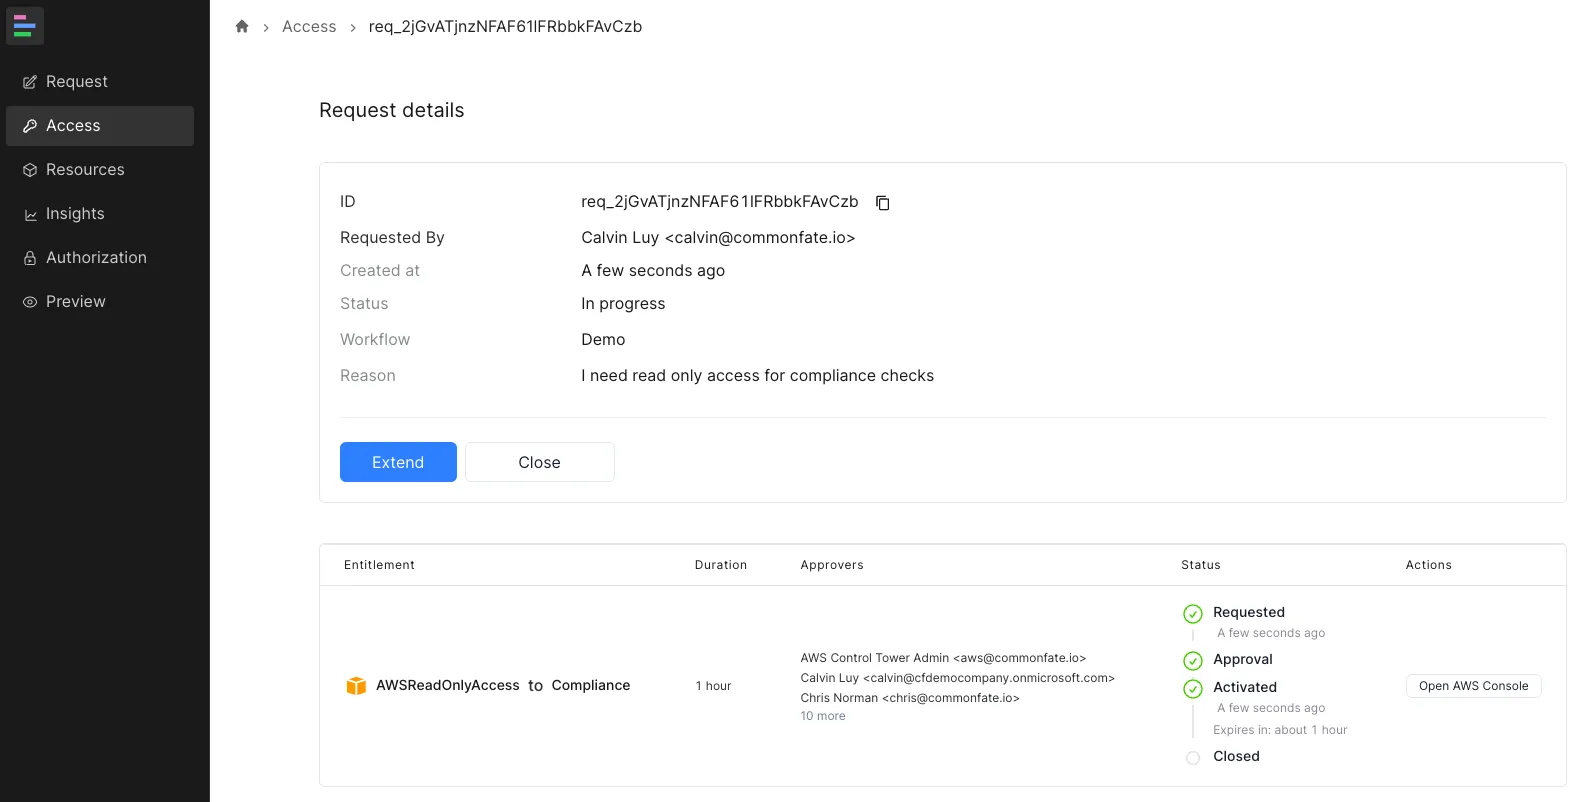
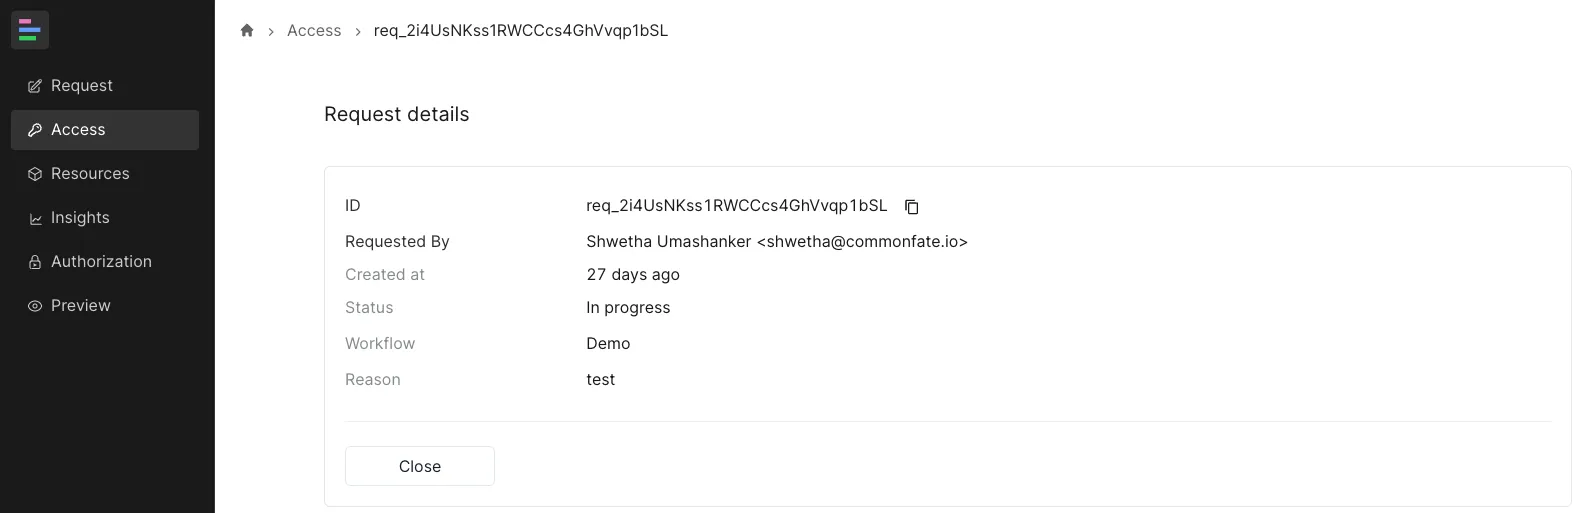
Close Request
Navigate to the Access tab in the sidebar, locate the request, and click Close:
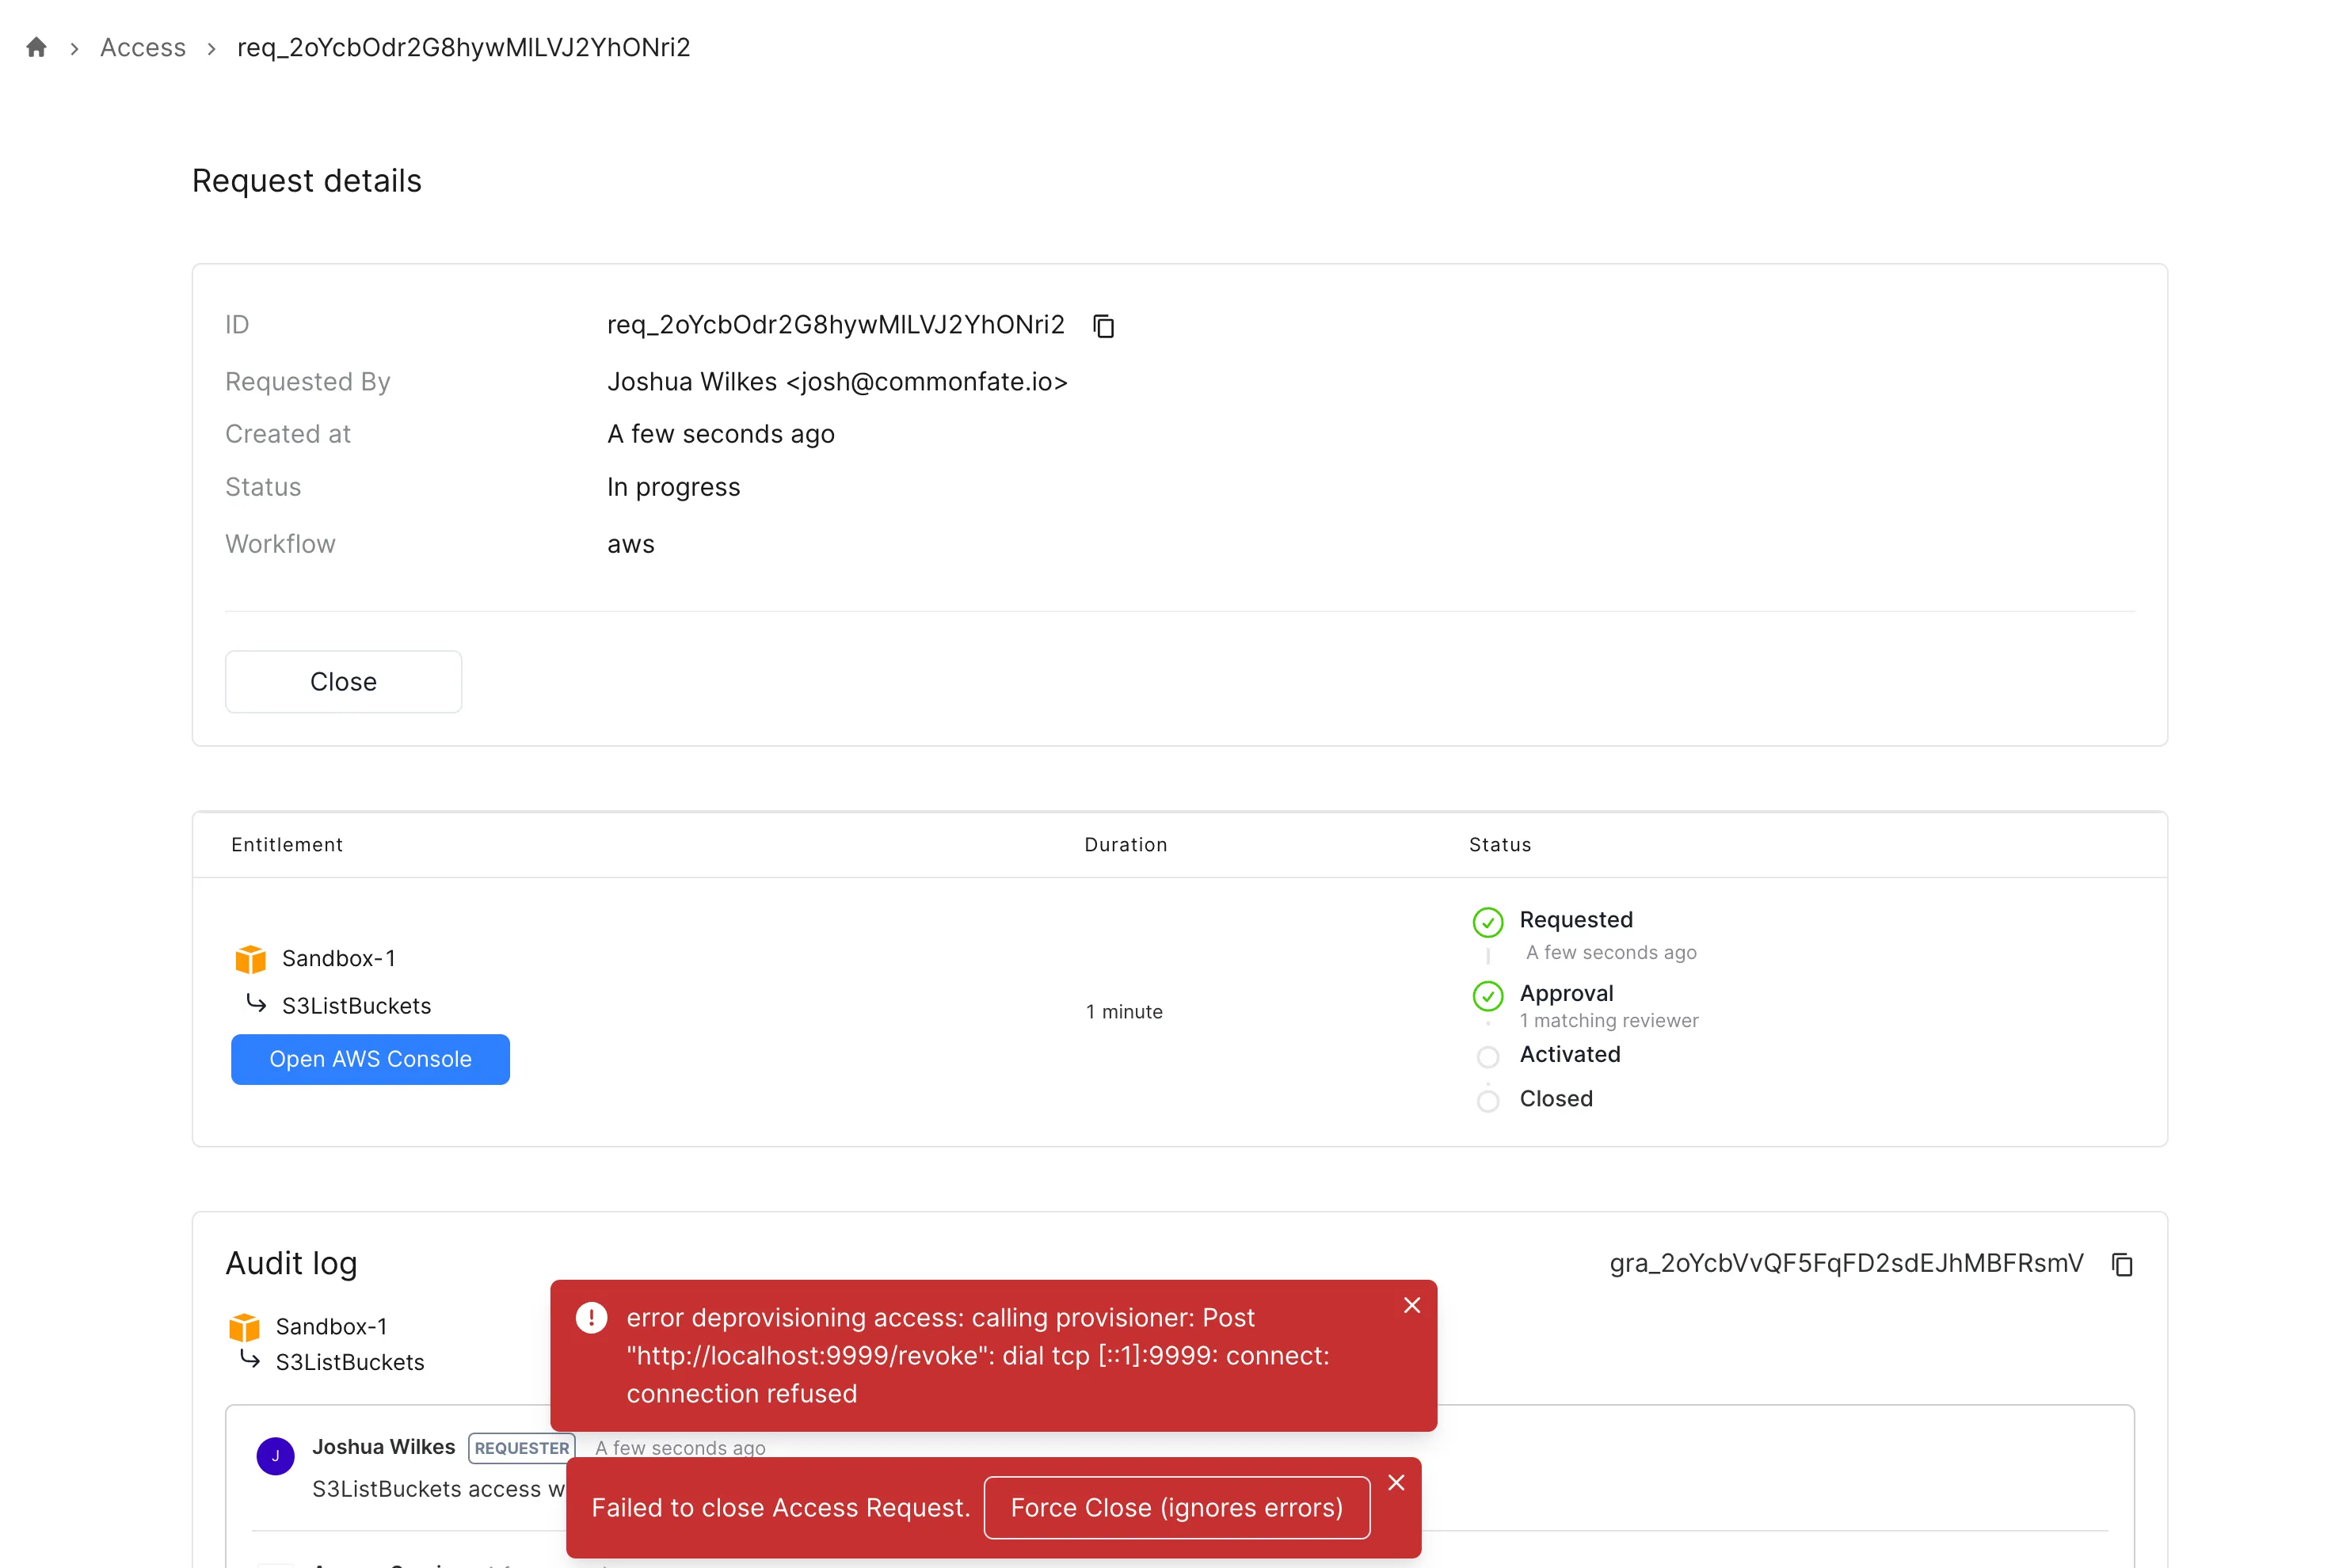
Force Close Request
In certain cases, like removing an integration while a grant was still active, you may find some grants cannot be closed automatically. In these cases, you may use the force close option to mark these requests as closed without performing any deprovisioning steps.
To be able to see the force close option, you will need to deploy a cedar policy which permits you to use the action.
permit ( principal == CF::User::"<Your user id>", action == Access::Action::"ForceClose", resource);Navigate to the Access tab in the sidebar, locate the request, and click Close. If an error happens, you will see an additional popup action to force close the request.