Authorization
In the Authorization Policy guide we introduced you to our authorization system. Authorization decision points within Common Fate are governed using policy-as-code.
Each time an authorization decision is made, Common Fate stores a log of the evaluation. In this guide you’ll learn how to use authorization logs to debug your authorization policies.
Prerequisites
If you’re running a BYOC (“Bring-Your-Own-Cloud”) deployment of Common Fate in your own AWS account, you’ll need to be on v1.25.0 or later of the common-fate/common-fate-deployment/aws Terraform module.
Grant the required permissions
By default, users in Common Fate don’t have permission to view authorization logs. To give yourself access, you’ll need to add a Cedar policy allowing the CF::Authz::Action::"GetEvaluation" action. To grant yourself access you’ll need your Common Fate user ID.
Find your Common Fate user ID in the web console by clicking on your profile in the lower corner, as shown below.
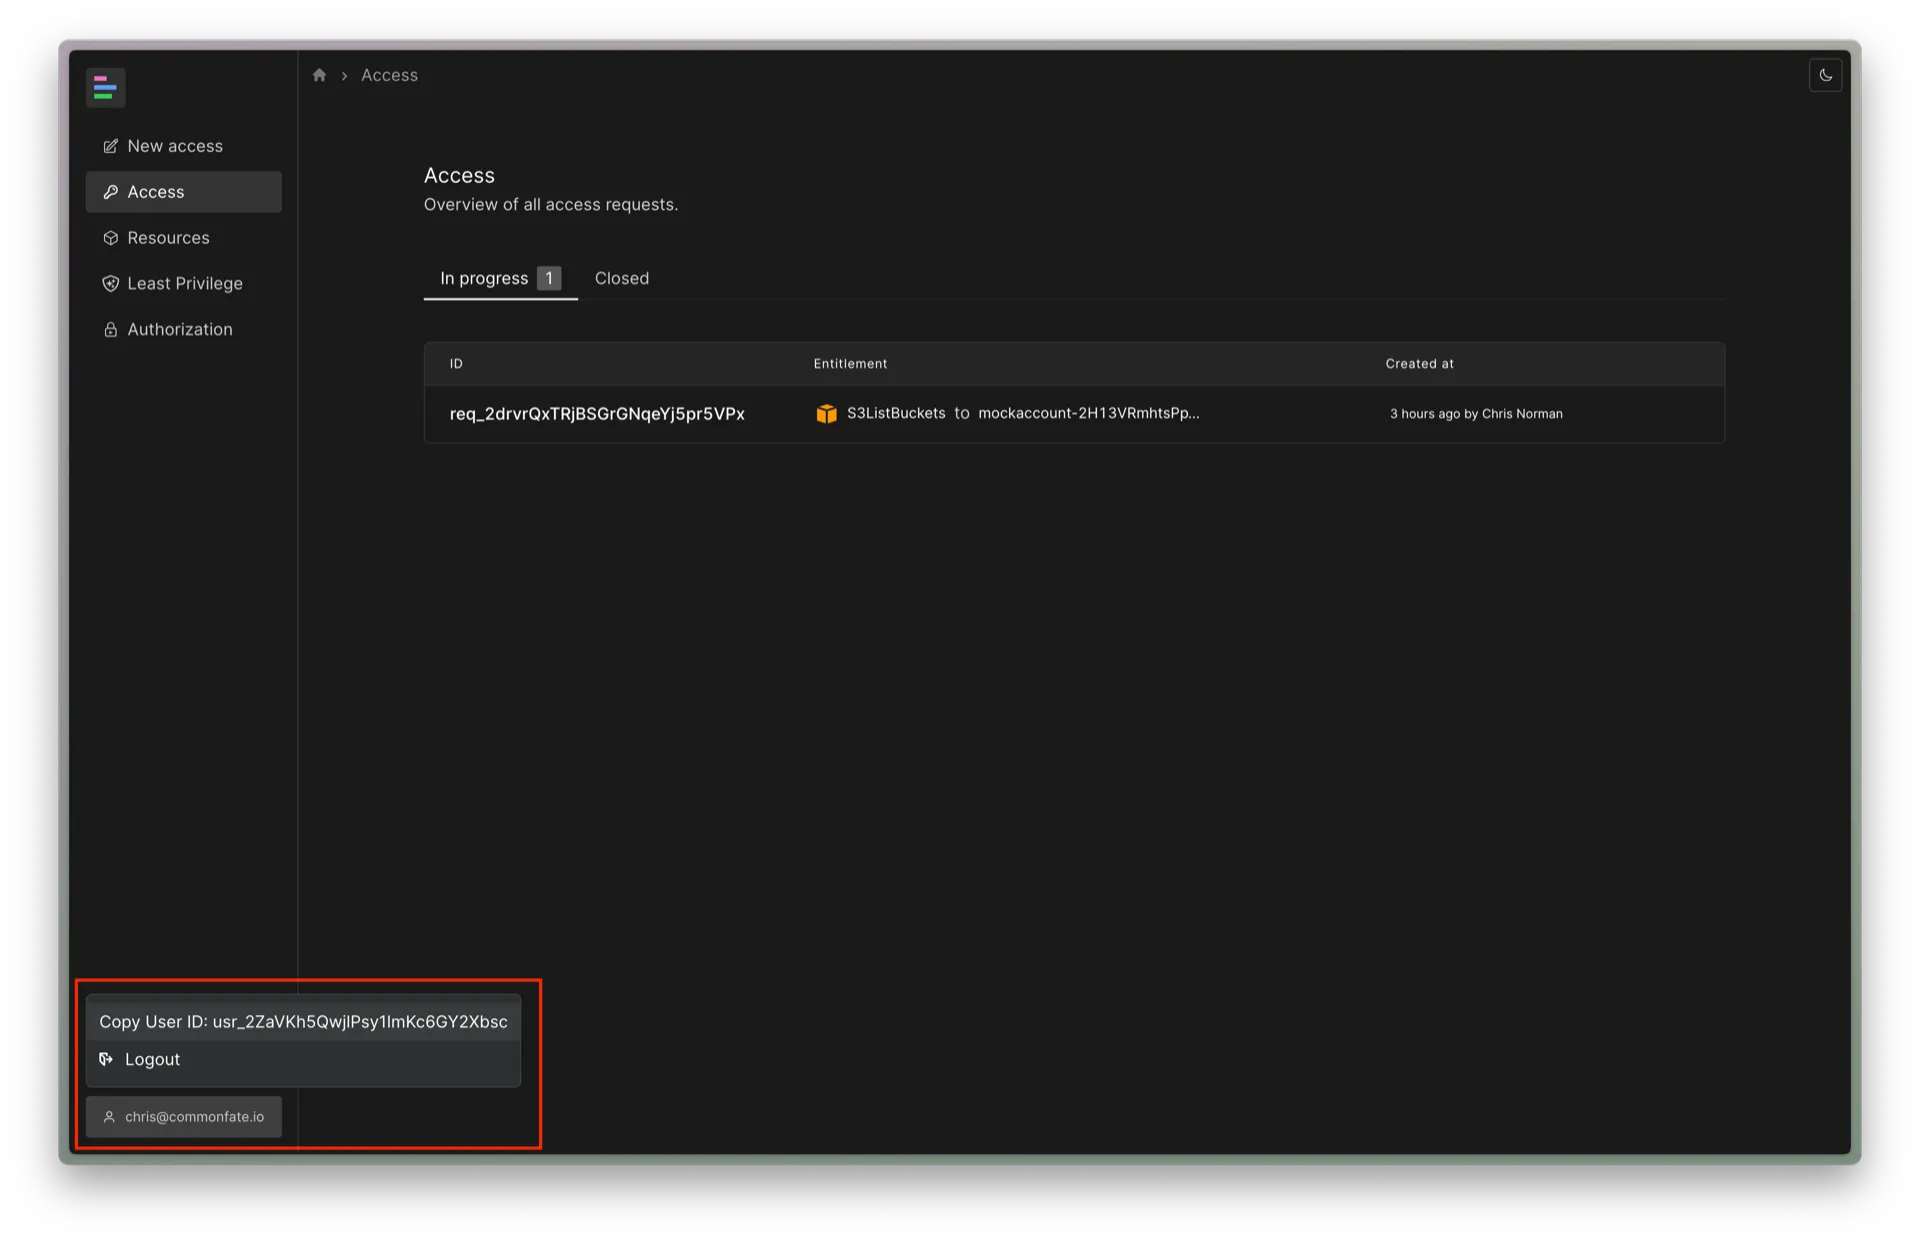
Your user ID should look something like usr_2ZaVKh5QwjlPsy1ImKc6GY2XbAf.
Then, add a Cedar policy which grants access to the CF::Authz::Action::"GetEvaluation" action:
permit( principal == CF::User::"<YOUR_USER_ID_HERE>", // replace with your user ID, e.g. CF::User::"usr_2ZaVKh5QwjlPsy1ImKc6GY2XbAf" action == CF::Authz::Action::"GetEvaluation", resource);Alternatively, you can grant yourself access to actions in the CF::Admin::Action::"Read" group, which contains all read-only administrative actions. CF::Authz::Action::"GetEvaluation" belongs to CF::Admin::Action::"Read". To grant access using this approach, apply the following policy:
permit( principal == CF::User::"<YOUR_USER_ID_HERE>", // replace with your user ID, e.g. CF::User::"usr_2ZaVKh5QwjlPsy1ImKc6GY2XbAf" action in CF::Admin::Action::"Read", // important: use 'in' rather than '==', because this is a group of actions resource);Usage
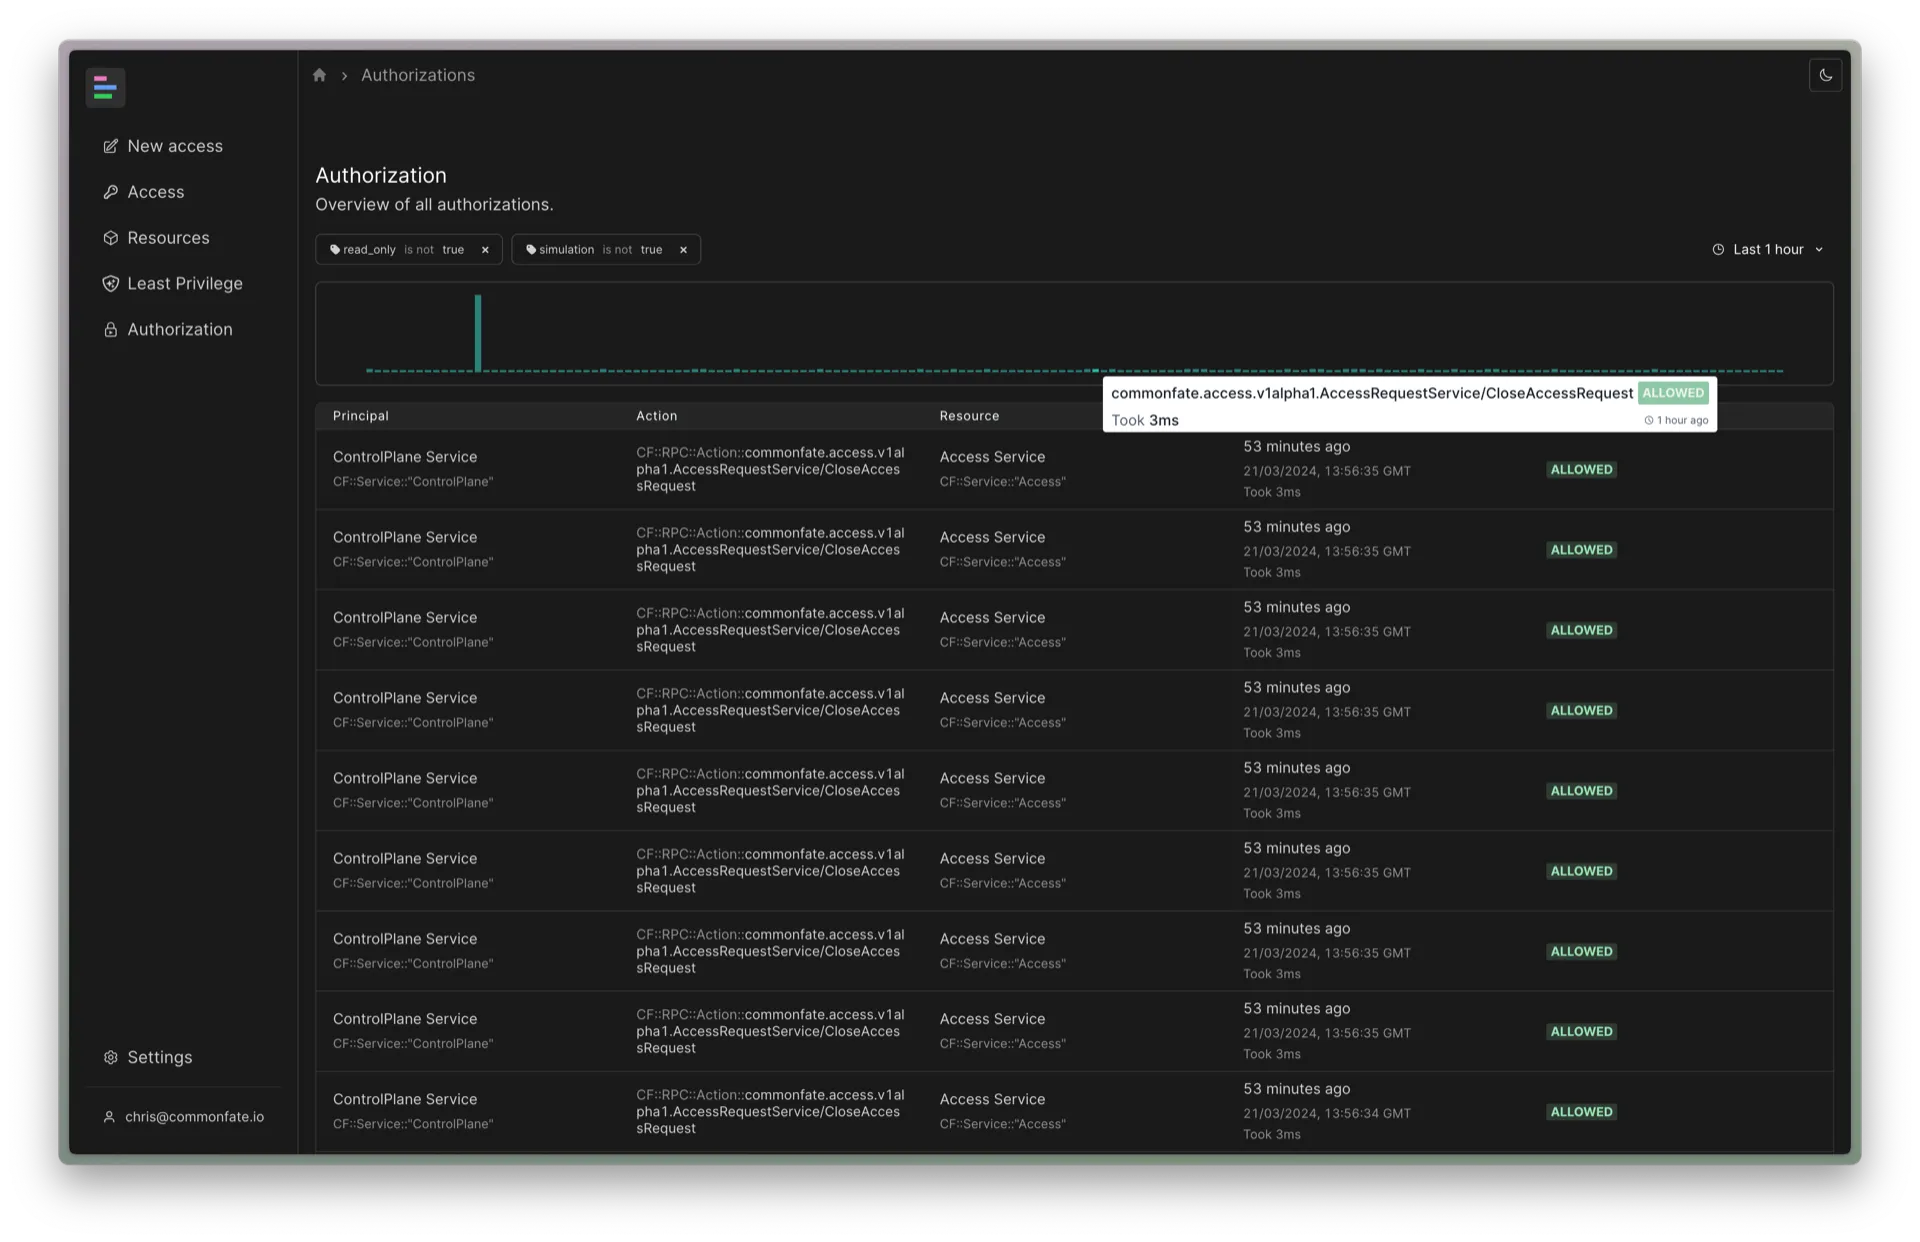
Once you’ve granted yourself access you should see an Authorization item appear in the navbar on the left of the web console. Click on the Authorization item to view the recent authorization evaluations. The graph at the top of the page shows a summary of decisions and latency for recent authorization evaluations. Failed authorizations are shown in red in the summary graph.
You can view the details for a particular authorization evaluation by clicking on a table row, or clicking on the summary graph.
You’ll see a detail page similar to the below:
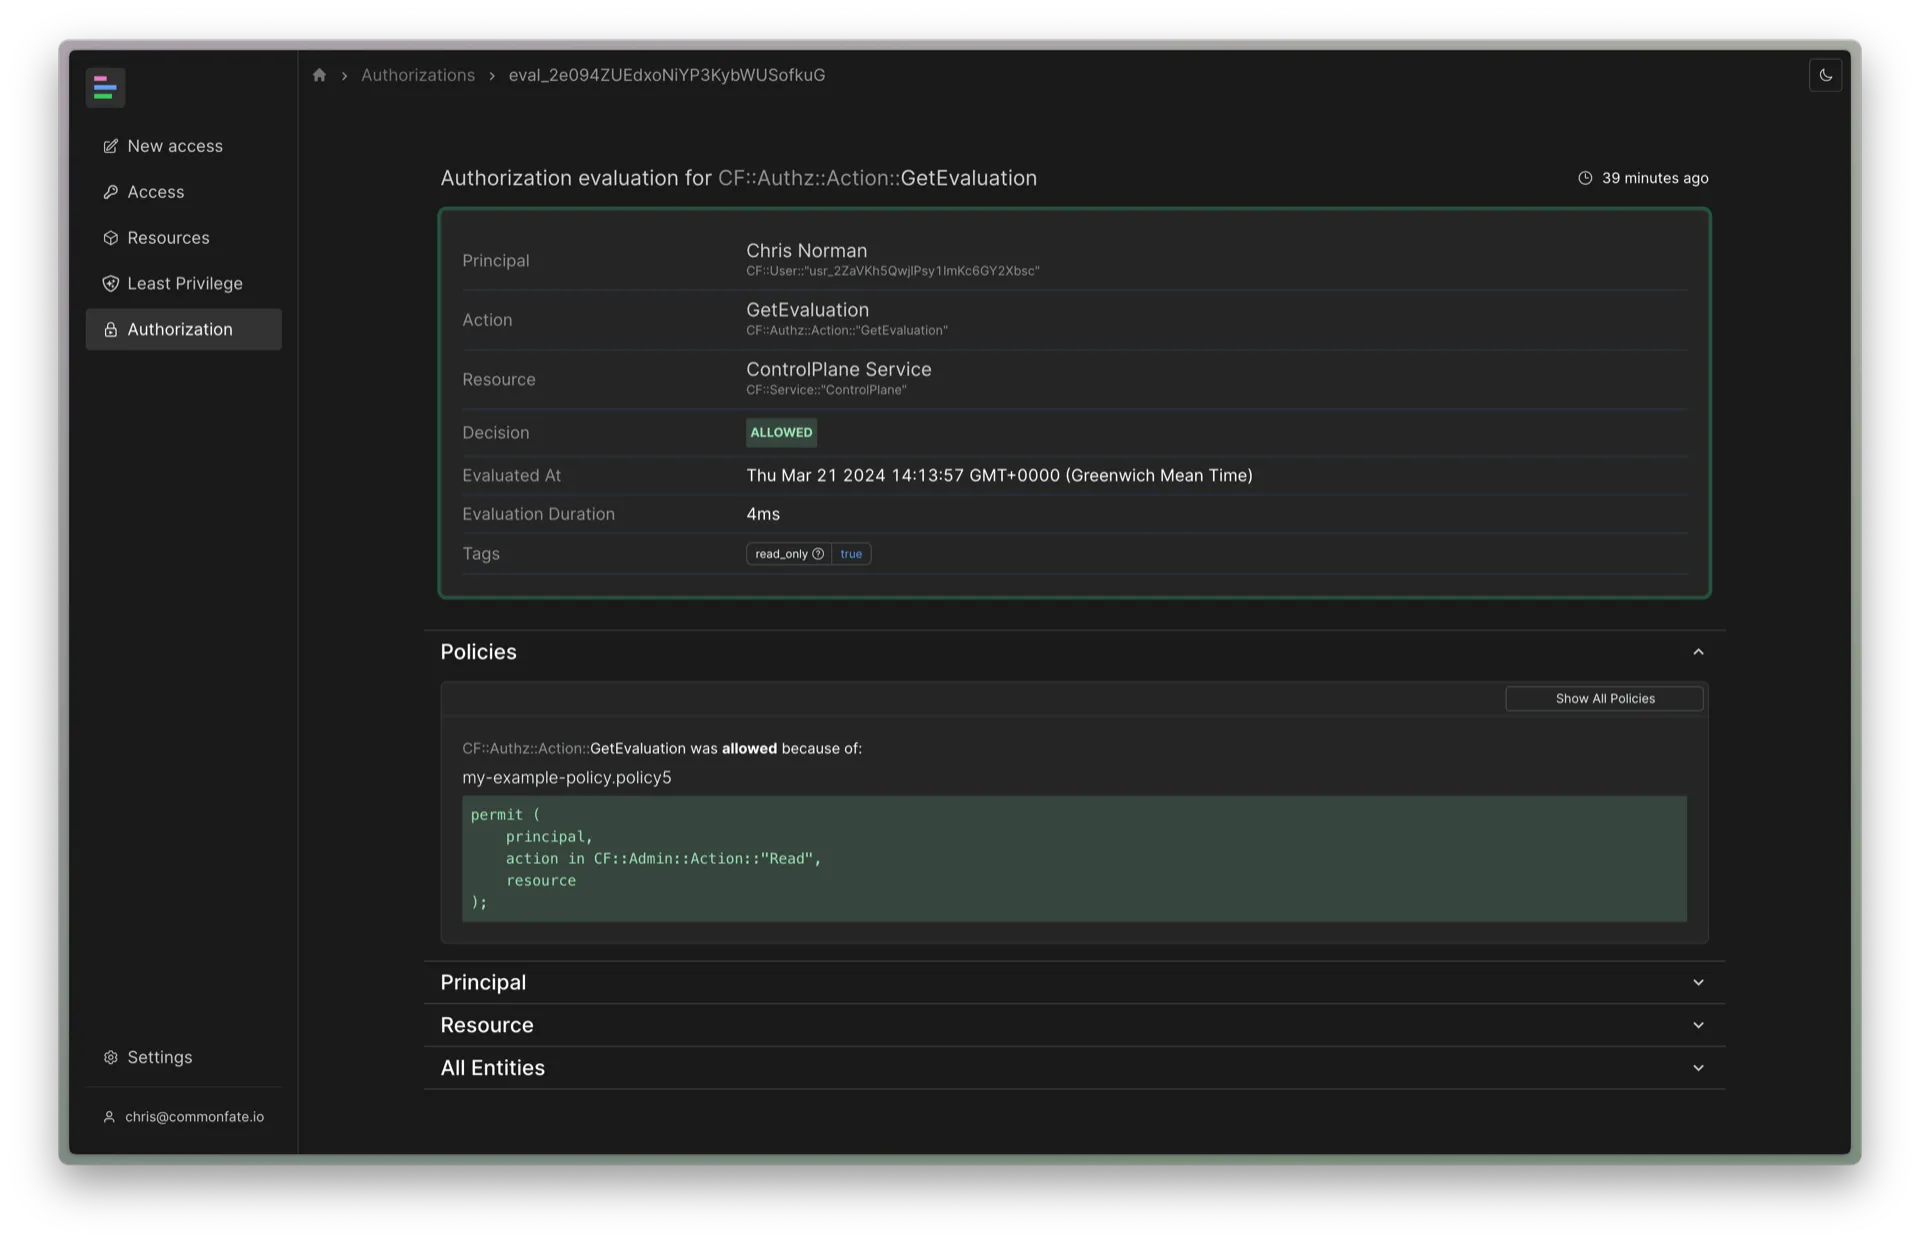
Details on this page include the Principal (the user or service attempting to perform the action), the Action (what was being done), and the Resource (the entity the action was being performed on). Common Fate will also show whether the action was allowed or denied, as well as relevant authorization policies which contributed to the authorization decision.
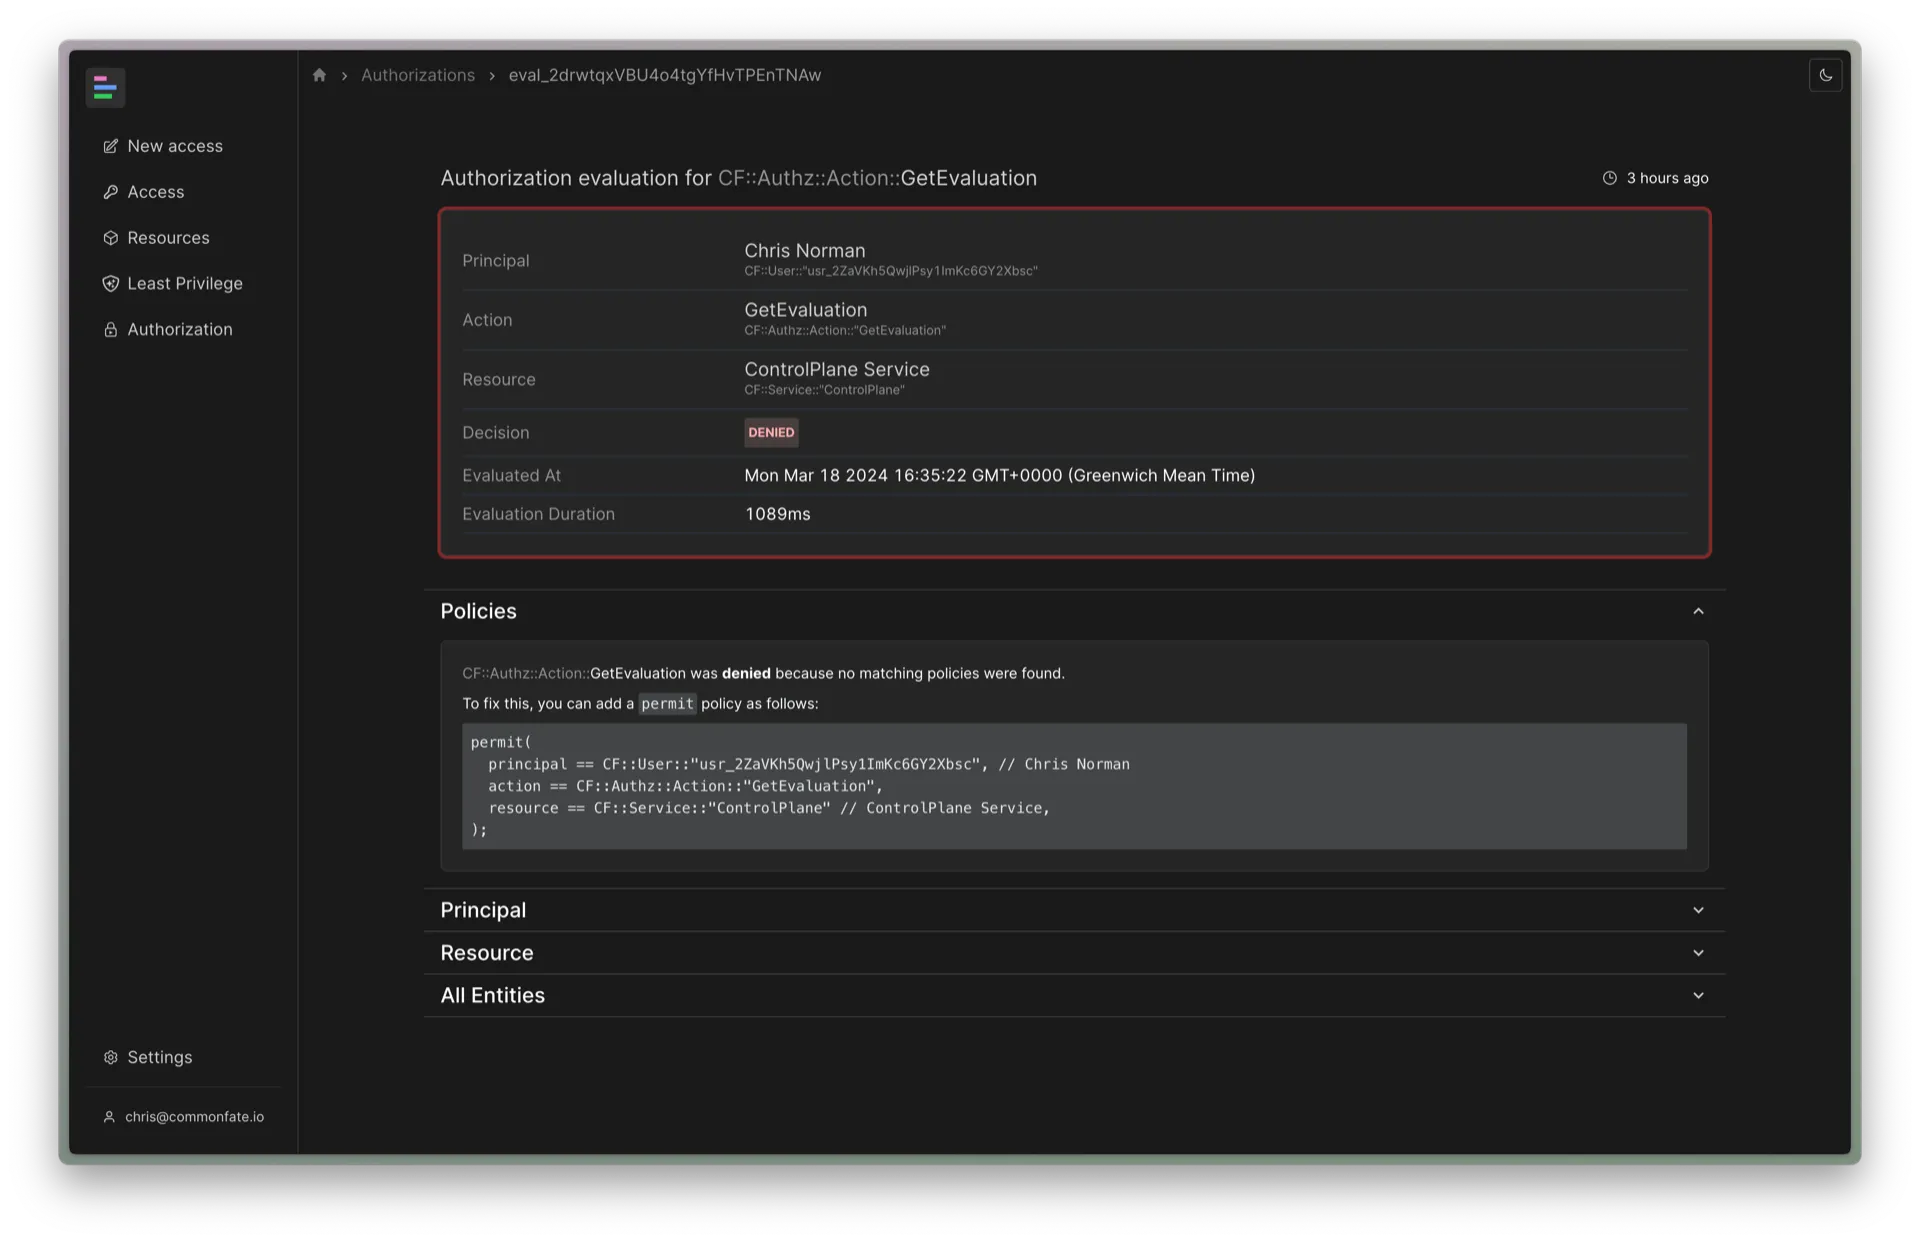
In some instances, you’ll see policy recommendations on this page too. For example, if Common Fate couldn’t find any policies granting or forbidding access, we’ll generate a recommended policy for you to add:
Access Requests
If you have permission to view authorization events, Common Fate will show an additional View Authorization button in the Access Request audit logs. You can click on this button to jump to the authorization policy evaluation associated with a particular action on an Access Request, like an approval or activation.

Tags
Common Fate uses Tags to group authorization events on attributes. Tags are shown in the web console when viewing a particular authorization evaluation.
| Tag | Description |
|---|---|
read_only | Set to true for operations which don’t update data. |
simulation | Common Fate sometimes runs several authorizations at once to determine which resources a user can access. These authorizations are tagged with simulation set to true. |
Filtering
To find authorization events faster, you can use filters in the Common Fate web console. By default, the web console filters out events that have a read_only=true tag or simulation=true. Filters are shown at the top of the web console.
To add a filter based on a tag or an authorization decision, click the Add Filter button as shown below:

You can also filter for authorization events relating to a particular principal, action, or resource by hovering over a table cell and clicking the funnel icon which appears, as shown below:
