Microsoft Entra
SAML configuration
To configure Microsoft Entra (formerly Azure AD) as the identity provider, follow these steps to create an Enterprise Application in your Azure console.
To add an enterprise application to your tenant:
- Sign in to the Microsoft Entra admin center as at least a Cloud Application Administrator.
- Browse to Identity > Applications > Enterprise applications > All applications.
- Select New application.
- Select Create your own application.
- Enter a name e.g ‘Common Fate’
- Select Integrate any other application you don’t find in the gallery (Non-gallery)
- Click Create
You will now be on the application overview page.
-
Select Single sign-on
-
Select SAML
-
In Basic SAML Configuration set Identifier (Entity ID) to the
first_time_setup_config.saml_sso_entity_idfrom the deployment outputs -
In Basic SAML Configuration set Reply URL (Assertion Consumer Service URL) to the
first_time_setup_config.saml_sso_acs_urlfrom the deployment outputs -
In Attributes & Claims set emailaddress to
user.mail -
Finally, copy the App Federation Metadata Url and save the configuration
-
Add the following variables to your Terraform deployment
saml_provider_name = "Entra"saml_metadata_is_file = falsesaml_metadata_source = <App Federation Metadata Url**>** -
Run a deployment
Terminal window terraform apply
SCIM user and group provisioning
-
To configure SCIM you will need to create a secret token for API authentication, use a strong token generator to generate a secret, then save it to SSM Parameter Store.
You can use the AWS CLI to create a secret in the region you are deploying to, you must use the following path
"/<namespace>/<stage>/<secret name>"Terminal window aws ssm put-parameter \--name "/common-fate/prod/scim-secret" \--value "mySecretValue" \--type "SecureString" \--region "ap-southeast-2"Retrieve the ARN
Terminal window aws ssm get-parameter \--name "/common-fate/prod/scim-secret" --query Parameter.ARN -
Add the following into your
main.tffilescim_token_ps_arn = <scim secret parameter store ARN>scim_source = "Entra" -
Run a deployment
Terminal window terraform apply -
Sign in to the Microsoft Entra Admin Center as at least a Cloud Application Administrator.
-
Browse to Identity > Applications > Enterprise applications > Search for your application e.g Common Fate
-
Select Users and groups
-
Assign Groups to the application, You should assign all the Groups for which you would like to create Access Policies for with Common Fate
-
You can optionally assign individual users to the application as well
-
Select Provisioning
-
Select Manage > Provisioning
-
Set Provisioning Mode to Automatic
-
Under Admin Credentials set tenant URL to
https://<your app URL>/api/v1/scim/Entra -
Under Admin Credentials set Secret Token to your secret generated previously
-
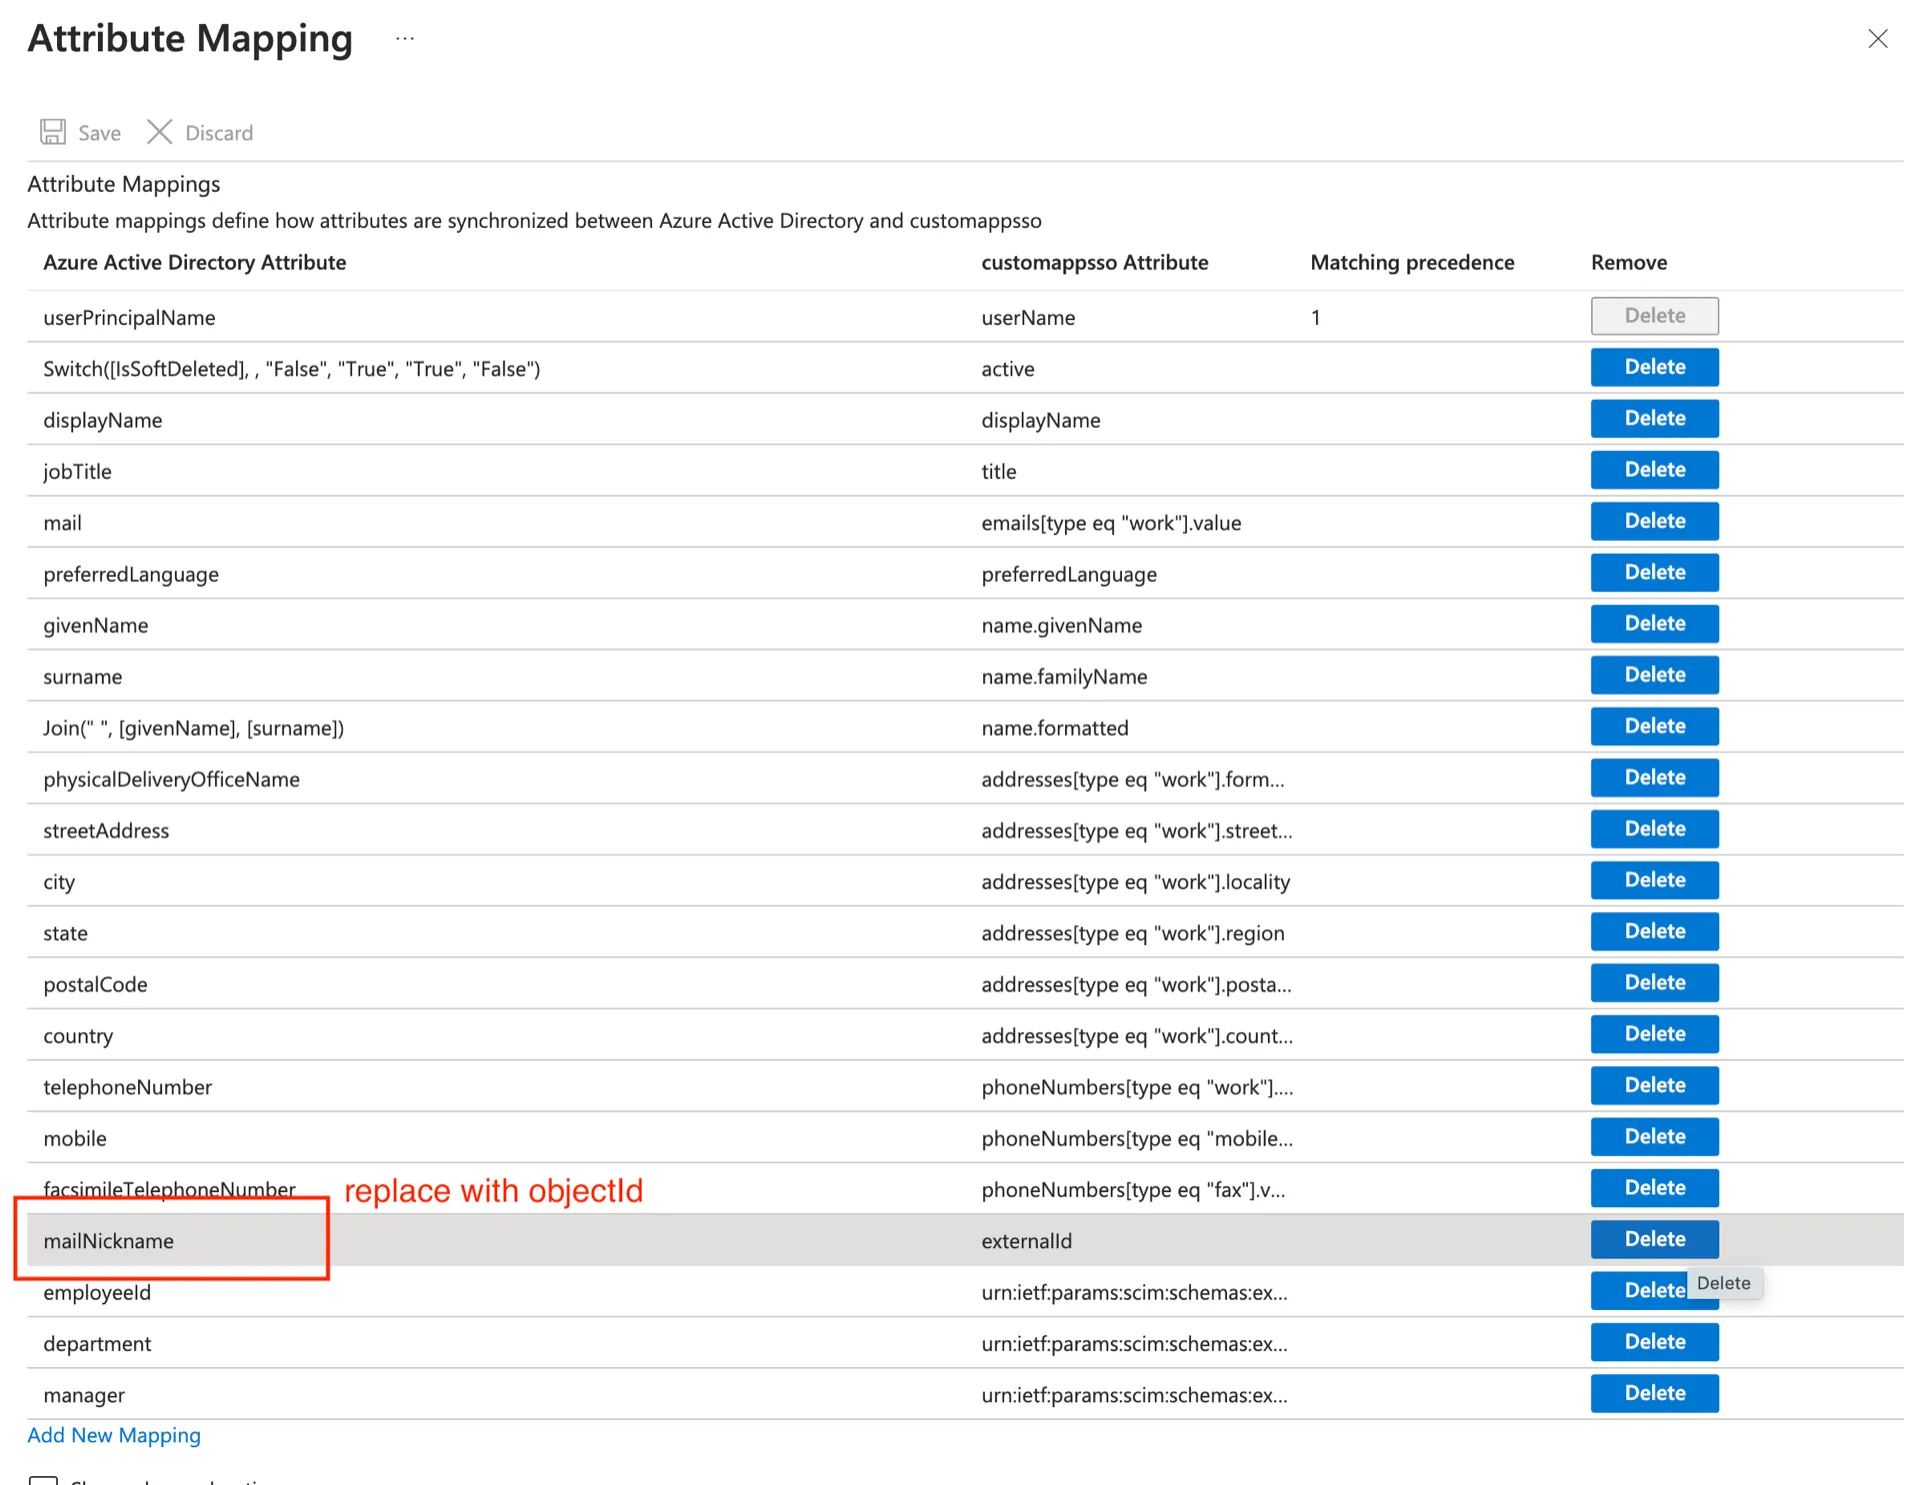
Under Mappings go to the Provision Microsoft Entra ID Users settings and replace the mailNickname to externalId mapping: it must be objectId to externalId.

-
Click Test Connection you should get a success message
-
Navigate back to Provisioning > Overview
-
Select Start Provisioning
-
Optionally: Provision yourself on demand the login to the Common Fate web application.
At this point the Application is fully deployed and ready to be configured, users and groups will start to sync automatically, you can provision on demand at any time if need be.
Resetting
If you’ve misconfigured the Entra SCIM integration, you can reset the integration using Common Fate. This is useful in case you’ve missed step (14) above to set the objectId mapping up.
In order to reset the Entra SCIM integration, you’ll first need to give yourself permission to trigger the reset.
First, obtain your Common Fate user ID by running:
cf identity getYou should see an output similar to the below:
> cf identity getChris Norman <chris@commonfate.io> (CF::User::"usr_2ZFBBf4gOevAXQi9aAfK2tYUeFa")Your user ID is shown in brackets at the end of the CLI output. It should look something like usr_2ZFBBf4gOevAXQi9aAfK2tYUeFa.
Then, add a Cedar policy which grants access to the CF::Control::Integration::Reset::ResetService::Action::"ResetEntraUsers" action:
permit( principal == CF::User::"<YOUR_USER_ID_HERE>", // replace with your user ID, e.g. CF::User::"usr_2ZFBBf4gOevAXQi9aAfK2tYUeFa" action == CF::Control::Integration::Reset::ResetService::Action::"ResetEntraUsers", resource);Next, disable SCIM user provisioning in Entra ID for the Common Fate application.
Then, verify in Microsoft Entra that objectId is mapped to externalId:
Now, run a dry-run of the reset:
cf integration reset entra --dry-run=trueCommon Fate will show you a preview of the entities which will be removed.
After you’ve confirmed the entities, proceed by running the reset:
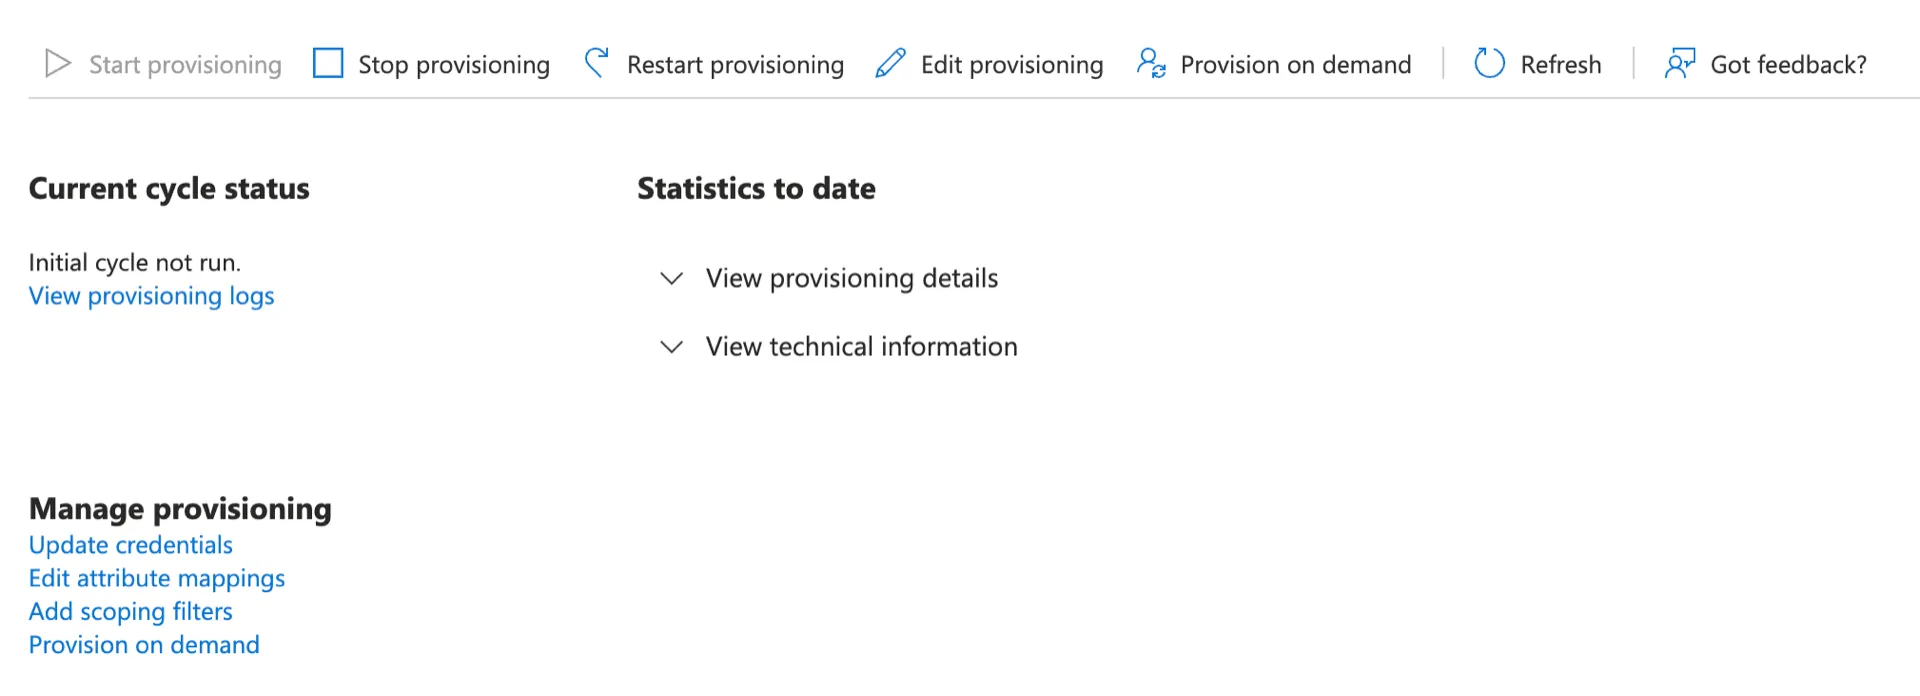
cf integration reset entra --dry-run=falseNow, enable SCIM user provisioning again in Common Fate. You’ll need to wait up to 5 minutes for the initial SCIM sync to complete.
You may need to click the Restart button. Ensure that the your administrative page looks like the screenshot below to force a full sync.
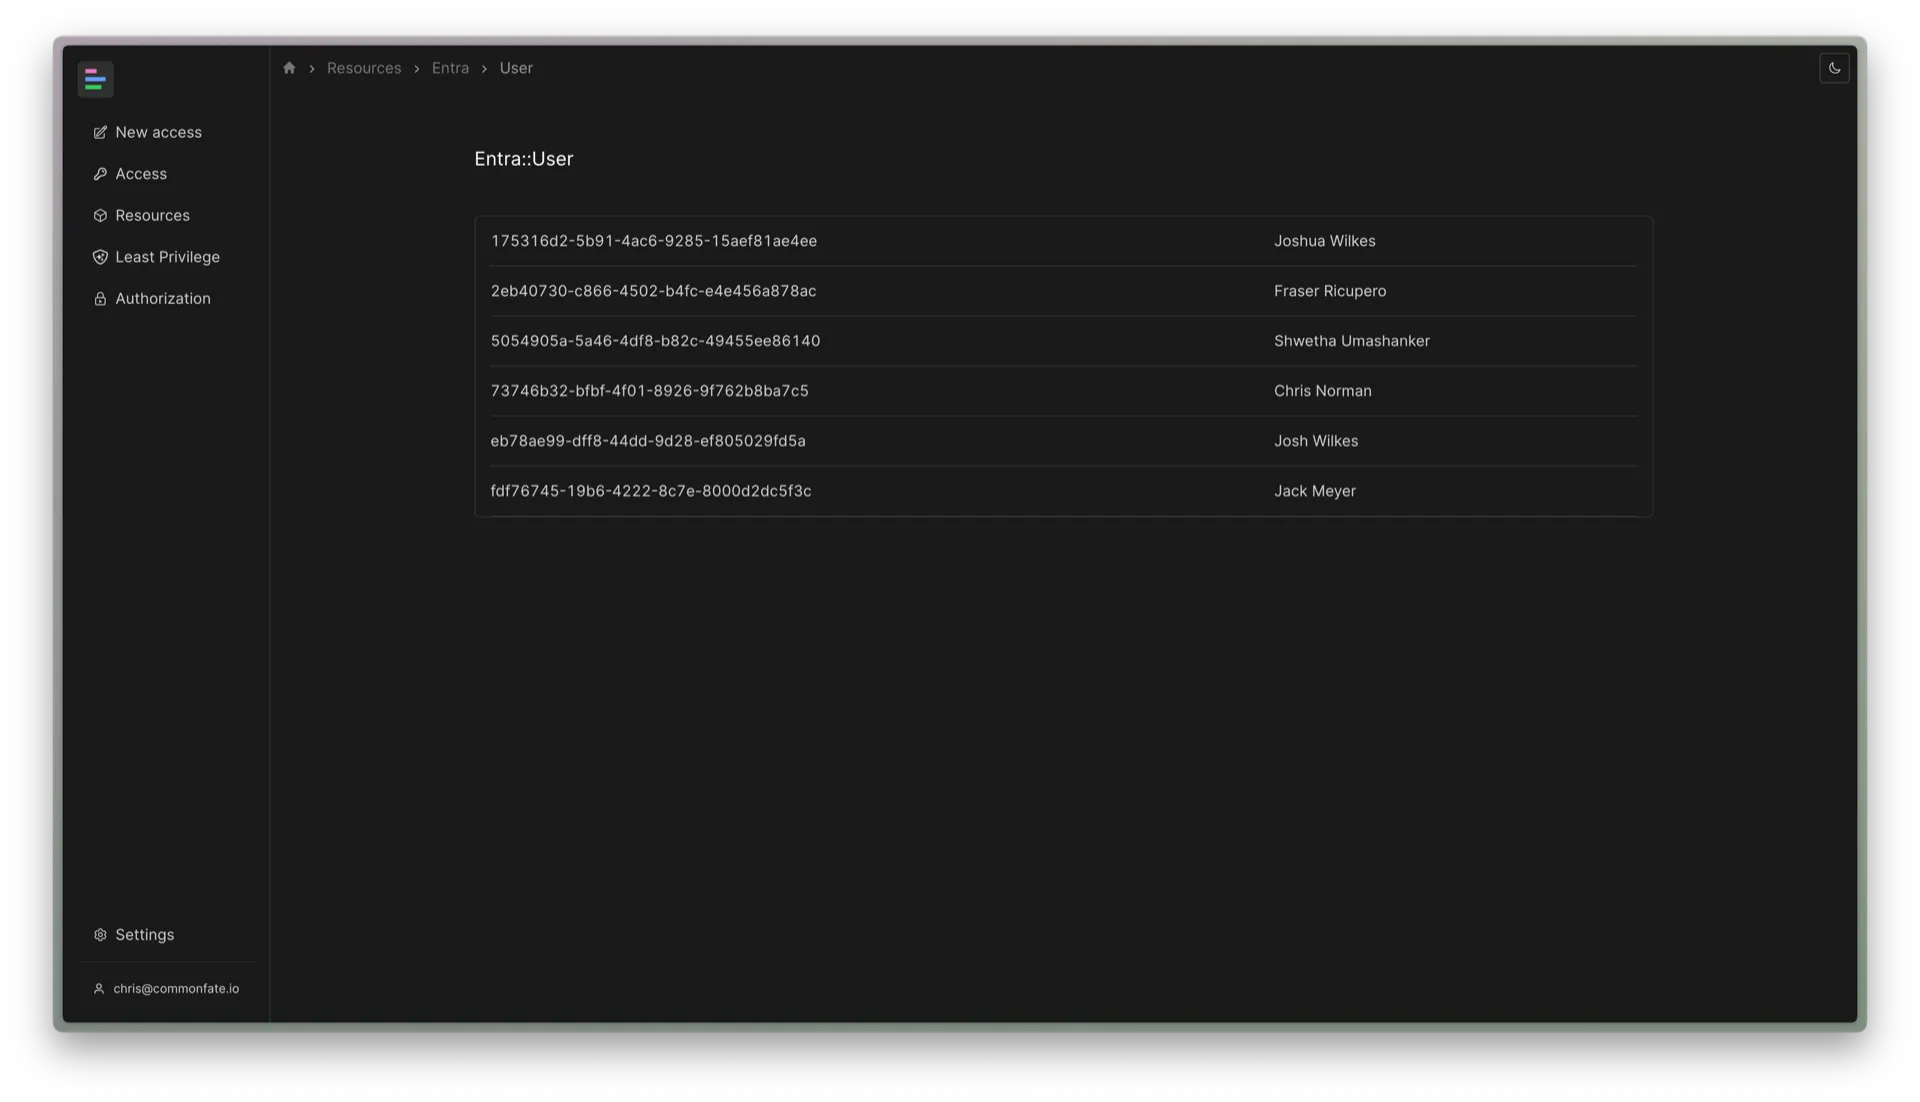
After the SCIM process is complete, visit the Resources page inside of Common Fate and verify that Entra::User resources are present in your deployment. Your Entra user resources should have an ID which looks similar to the screenshot below.
Finally, revoke your permissions to reset SCIM by removing the Cedar policy you applied earlier for the CF::Control::Integration::Reset::ResetService::Action::"ResetEntraUsers" action.
// remove this policy from your Cedar policy sets.permit( principal == CF::User::"<YOUR_USER_ID_HERE>", // replace with your user ID, e.g. CF::User::"usr_2ZFBBf4gOevAXQi9aAfK2tYUeFa" action == CF::Control::Integration::Reset::ResetService::Action::"ResetEntraUsers", resource);Allowing IDP-initiated sign in
IDP-initiated sign in is supported in Common Fate version 2.8.2 and later. If you’re using a BYOC deployment, you must set the saml_allow_idp_initiated_sign_in to true in your deployment Terraform module:
module "common-fate-deployment" { source = "common-fate/common-fate-deployment/aws" saml_allow_idp_initiated_sign_in = true}Then, specify the following Relay State within the Entra SAML single sign on settings:
identity_provider=Entra&client_id=<Web Client ID>&redirect_uri=https://<Deployment URL>/auth/callback&response_type=code&scope=openid+emailWhere <Web Client ID> is the OIDC client ID of the web application, obtained from the Cognito settings in AWS, and <Deployment URL> is the URL of your Common Fate deployment.