Auth0
This guide will walk you through integrating Common Fate with Auth0. By the end of this guide, you’ll have a functioning integration with Common Fate, allowing it to provision access to Auth0 Organizations.
Auth0 Setup
To configure the Auth0 integration, create a Machine-To-Machine application in the Auth0 administrative console.
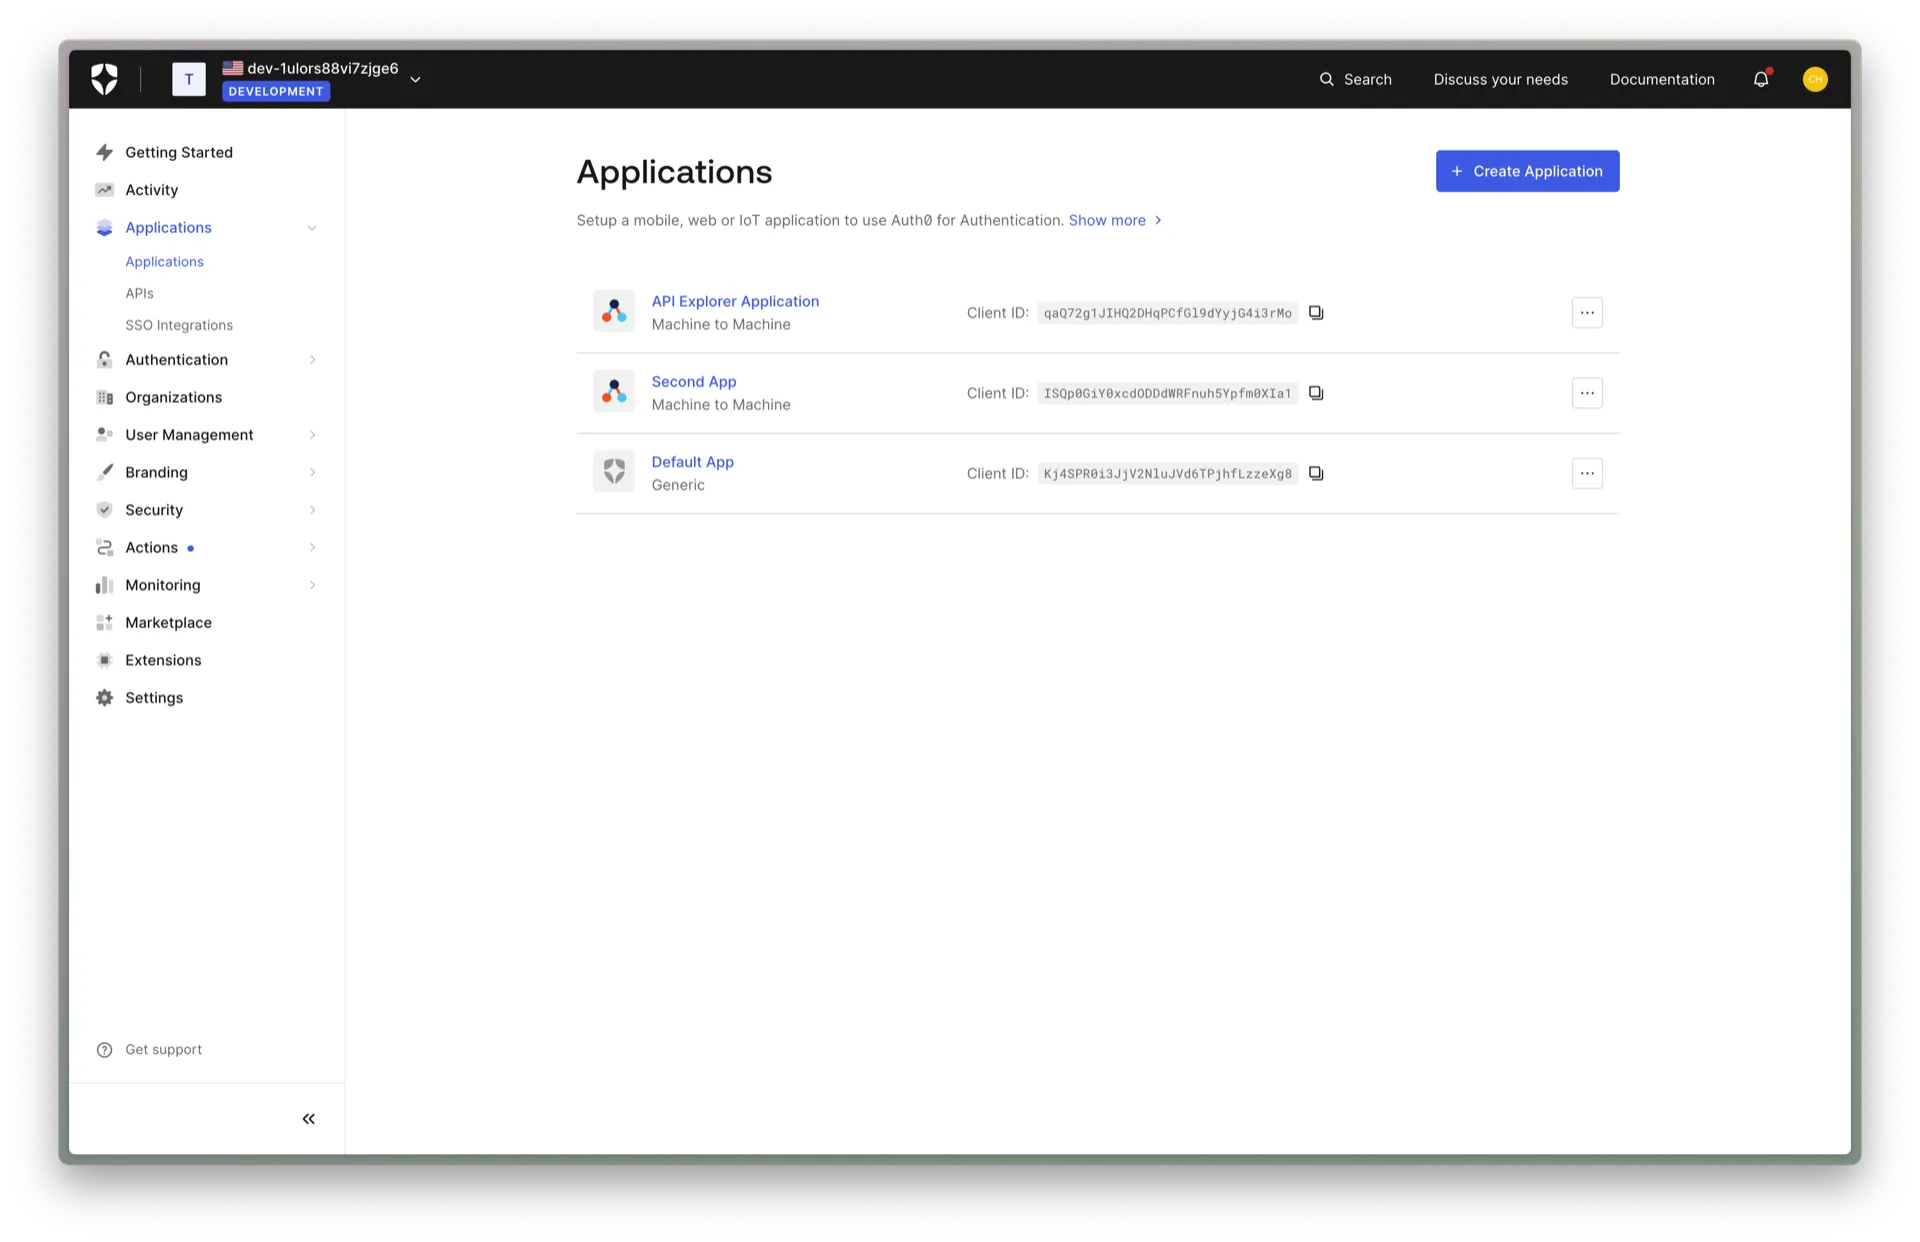
In the Auth0 administrative console, browse to Applications.
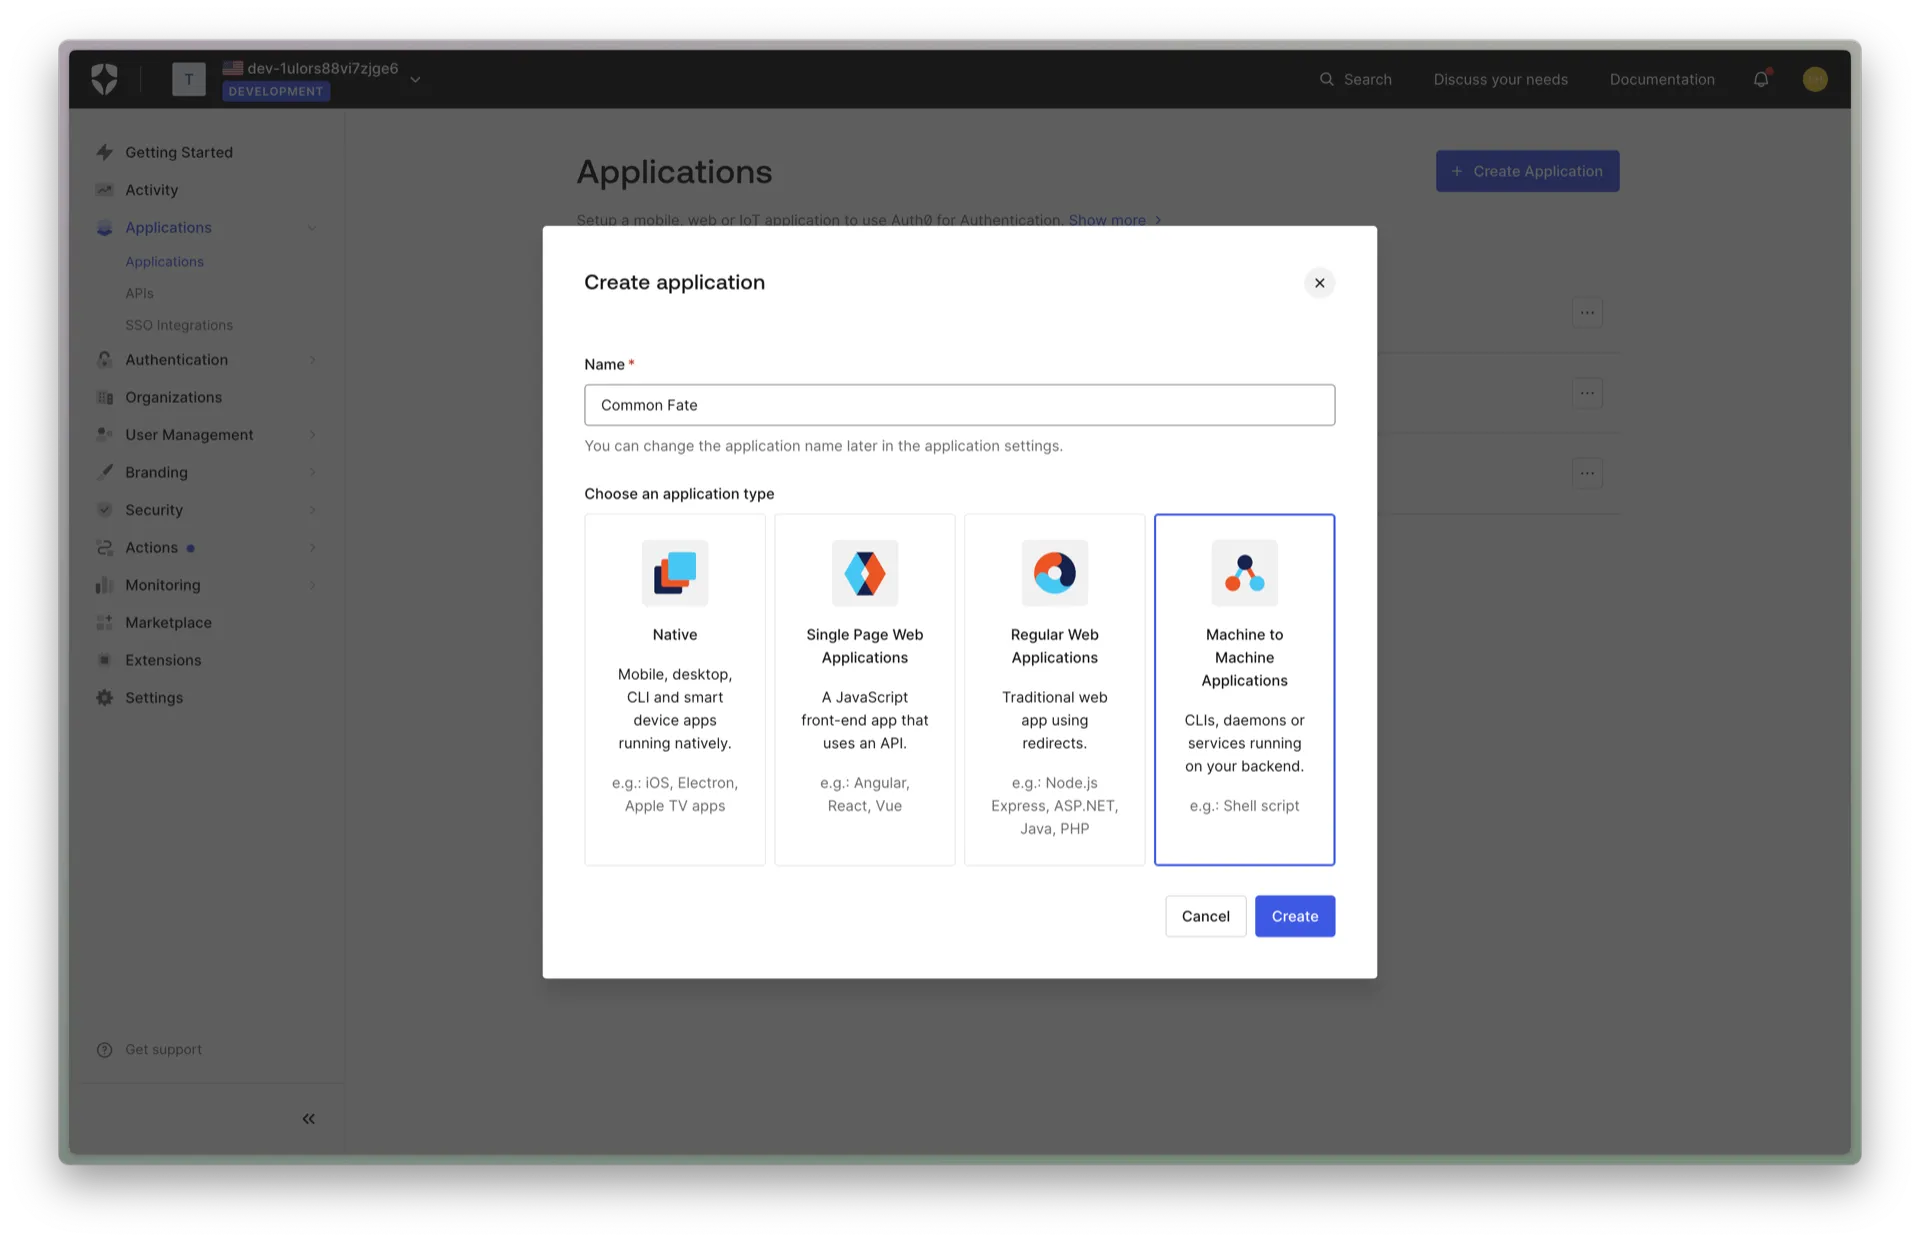
Name the application Common Fate. Choose Machine to Machine Applications as the application type.
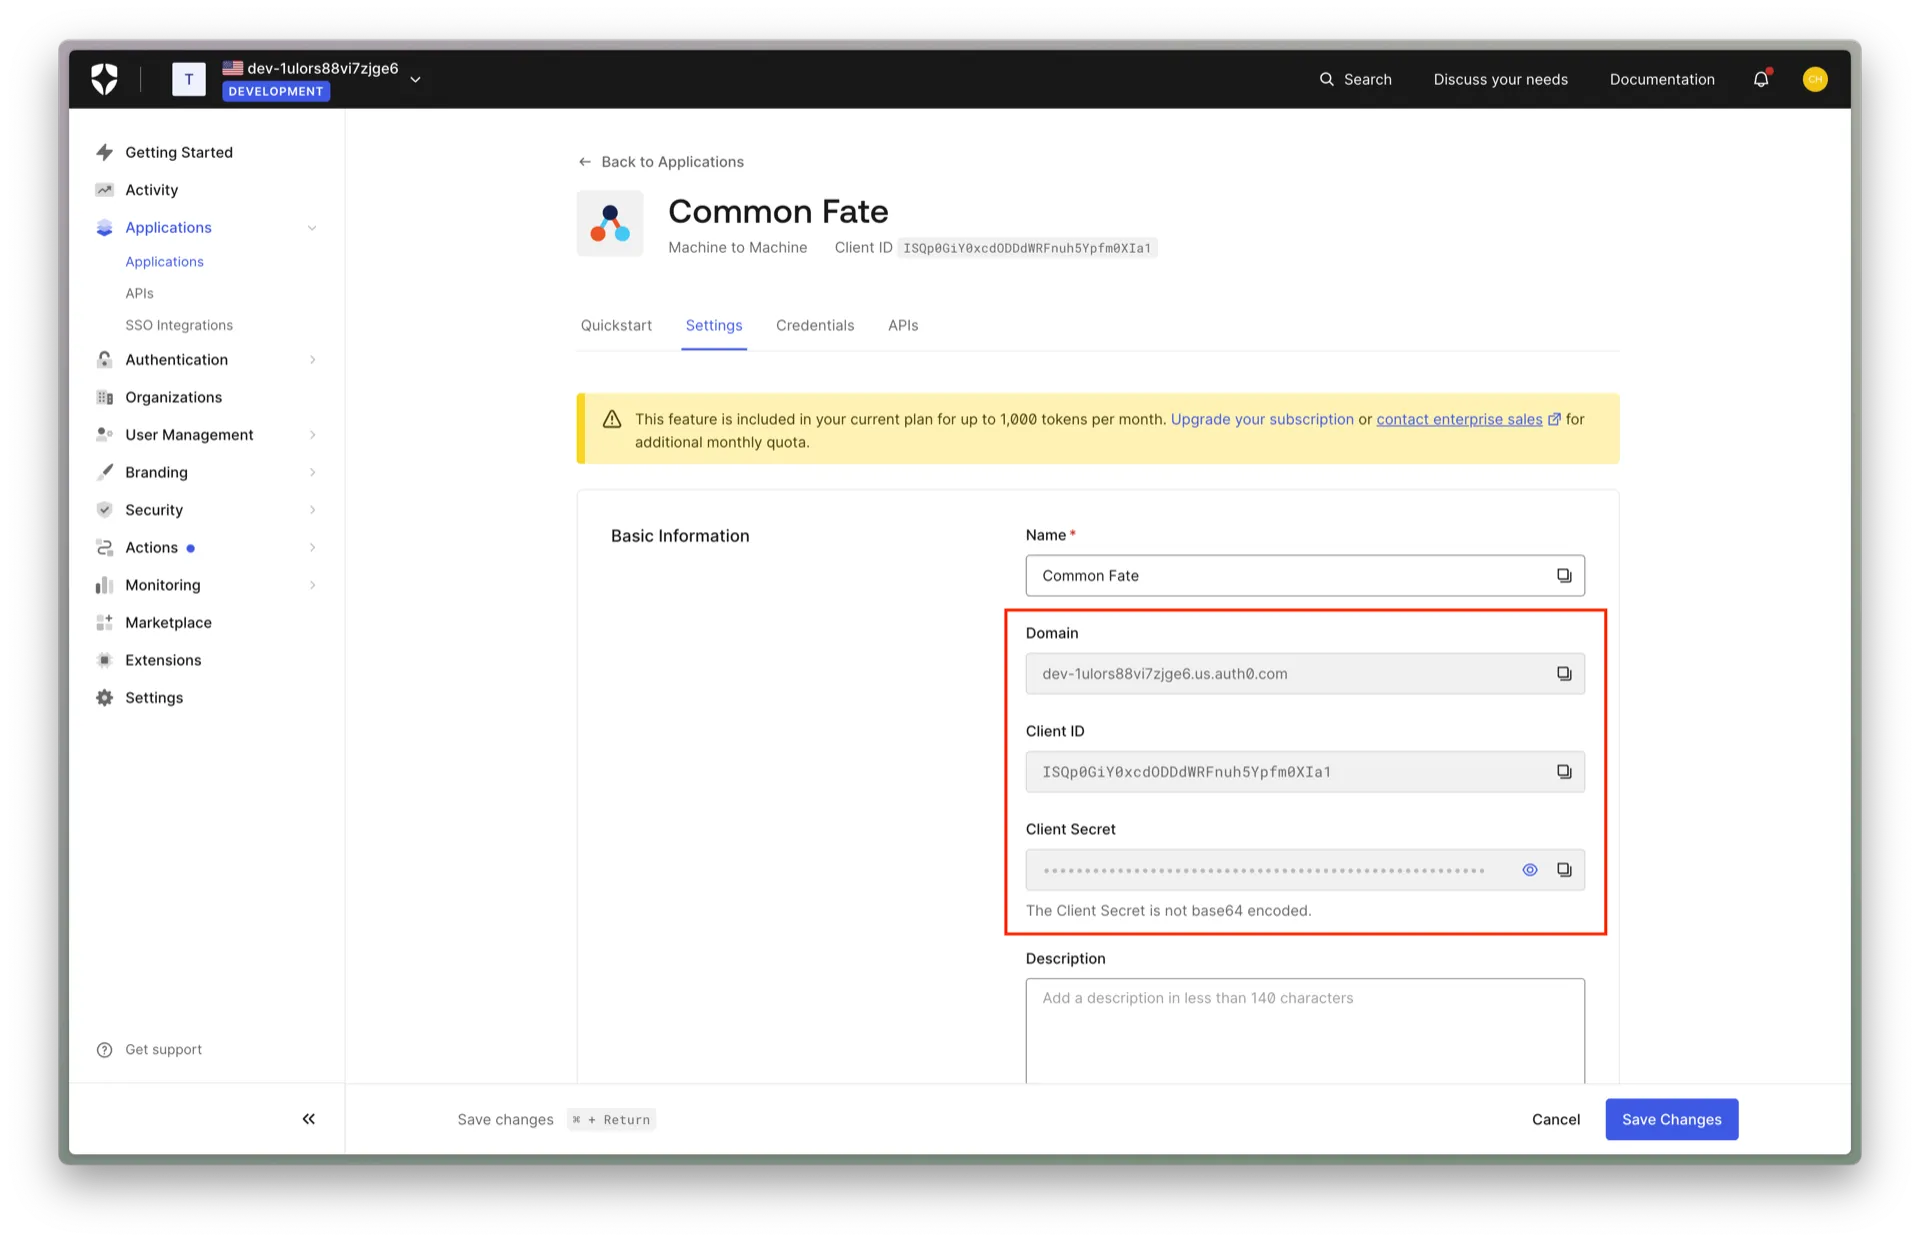
Click on the newly created application. Take a note of the Domain, Client ID, and Client Secret attributes, as you will need them in the next steps.
You will need to create a new SecretString in SSM Parameter Store and then use the path when configuring your deployment in Terraform.
You can use the AWS CLI to create a secret in the region you are deploying to. you must use the following path "/<namespace>/<stage>/<secret name>".
# run this in the AWS account and region that Common Fate is deployed toaws ssm put-parameter \ --name "/common-fate/prod/auth0-client-secret" \ --value "<client secret from the above step>" \ --type "SecureString"Configuring Common Fate
In this section, you will register the Auth0 integration with your Common Fate deployment. At the end of this section you should have Common Fate ready to provision access. You’ll need to have set up the Common Fate Application Configuration repository using our Terraform provider.
Inside your Application Configuration repository, add the following module:
resource "commonfate_auth0_integration" "auth0" { name = "Auth0" domain = "<your domain from above, e.g. dev-1ulors88vi7zjge6.us.auth0.com>" client_id = "<your Client ID from above, e.g. ISQp0GiY0xcdODDdWRFnuh5Ypfm0XIa1>" client_secret_secret_path = "/common-fate/prod/auth0-client-secret"}Apply the changes. If the apply succeeds, you should see the integration appear on the settings page in the web dashboard.
Provisioning access to Auth0 Organizations
You can now create an access workflow and availabilities:
resource "commonfate_access_workflow" "auth0" {  name                     = "auth0"  access_duration_seconds  = 60 * 60 * 2  priority                 = 1}
resource "commonfate_auth0_organization_selector" "select_all" {  id              = "example"  name            = "Example"  auth0_tenant_id = "<your Auth0 domain, e.g. dev-1ulors88vi7zjge6.us.auth0.com>"  when            = "true"}

resource "commonfate_auth0_organization_availabilities" "demo" {  workflow_id             = commonfate_access_workflow.auth0.id  okta_group_selector_id = commonfate_auth0_organization_selector.select_all.id  auth0_tenant_id = "<your Auth0 domain, e.g. dev-1ulors88vi7zjge6.us.auth0.com>"}