Introduction
An overview of Common Fate’s authorization system.
Common Fate uses a policy-as-code to govern the various decision points around granting access to entitlements. Common Fate policies are written using the open-source policy language Cedar. Writing Cedar policies is similar to writing software code: you can test and review changes using your existing tools like Terrafom and GitHub.
We recommend using the Cedar Language Guide in conjunction with our guide below. Cedar policies are structured with four main components:
Decorators
Decorators are annotations added to Cedar policies to provide additional instructions or messages to end users. They serve as helpful hints or notifications regarding the policy rules. For instance:
@advice("Auto-approved because the access is to the test environment")
This decorator provides guidance to users by indicating that the access is automatically approved due to it being in the test environment.
Principal
The principal component specifies the entity seeking access. For example:
principal == CF::User::"usr_2ZDvUXOkW9VX9qSjupKLKxRypGN";
Actions
Actions define the operations that can be performed within Common Fate. These actions include:
- Request access:
Access::Action::"Request" - Activate access:
Access::Action::"Activate" - Approve access:
Access::Action::"Approve" - Extend access:
Access::Action::"Extend" - Close request:
Access::Action::"Close"
The following is the workflow of the Cedar actions:

Additionally, we also have the following actions to enhance observability:
CF::Authz::Action::"GetEvaluation"CF::Admin::Action::"Read"
You can find more details about them here.
Resource
The resource component specifies the target or subject of the action. It identifies the entity upon which actions are taken. For example:
resource == GCP::Folder::"folders/1046849679918"; // Test Folder ID
When and Unless
The when and unless components define additional conditions under which the action is allowed. For instance:
when { resource.approved }
Policy Example
Here’s an example Cedar policy allowing users to close their own requests:
@advice("Closing your own request is permitted")
permit (
    principal,
    action == Access::Action::"Close",
    resource
)
when { principal == resource.principal };
This policy grants permission for a user to close their own request. It verifies that the principal (user) matches the principal associated with the resource, ensuring that only the requester can close their own request.
How Common Fate uses Cedar
Each authorization evaluation in Cedar has a Principal and a Resource. For actions including Access::Action::"Approve", Access::Action::"Request", Access::Action::"Activate" and Access::Action::"Close", the Principal is a User and Resource being acted upon is a Grant.
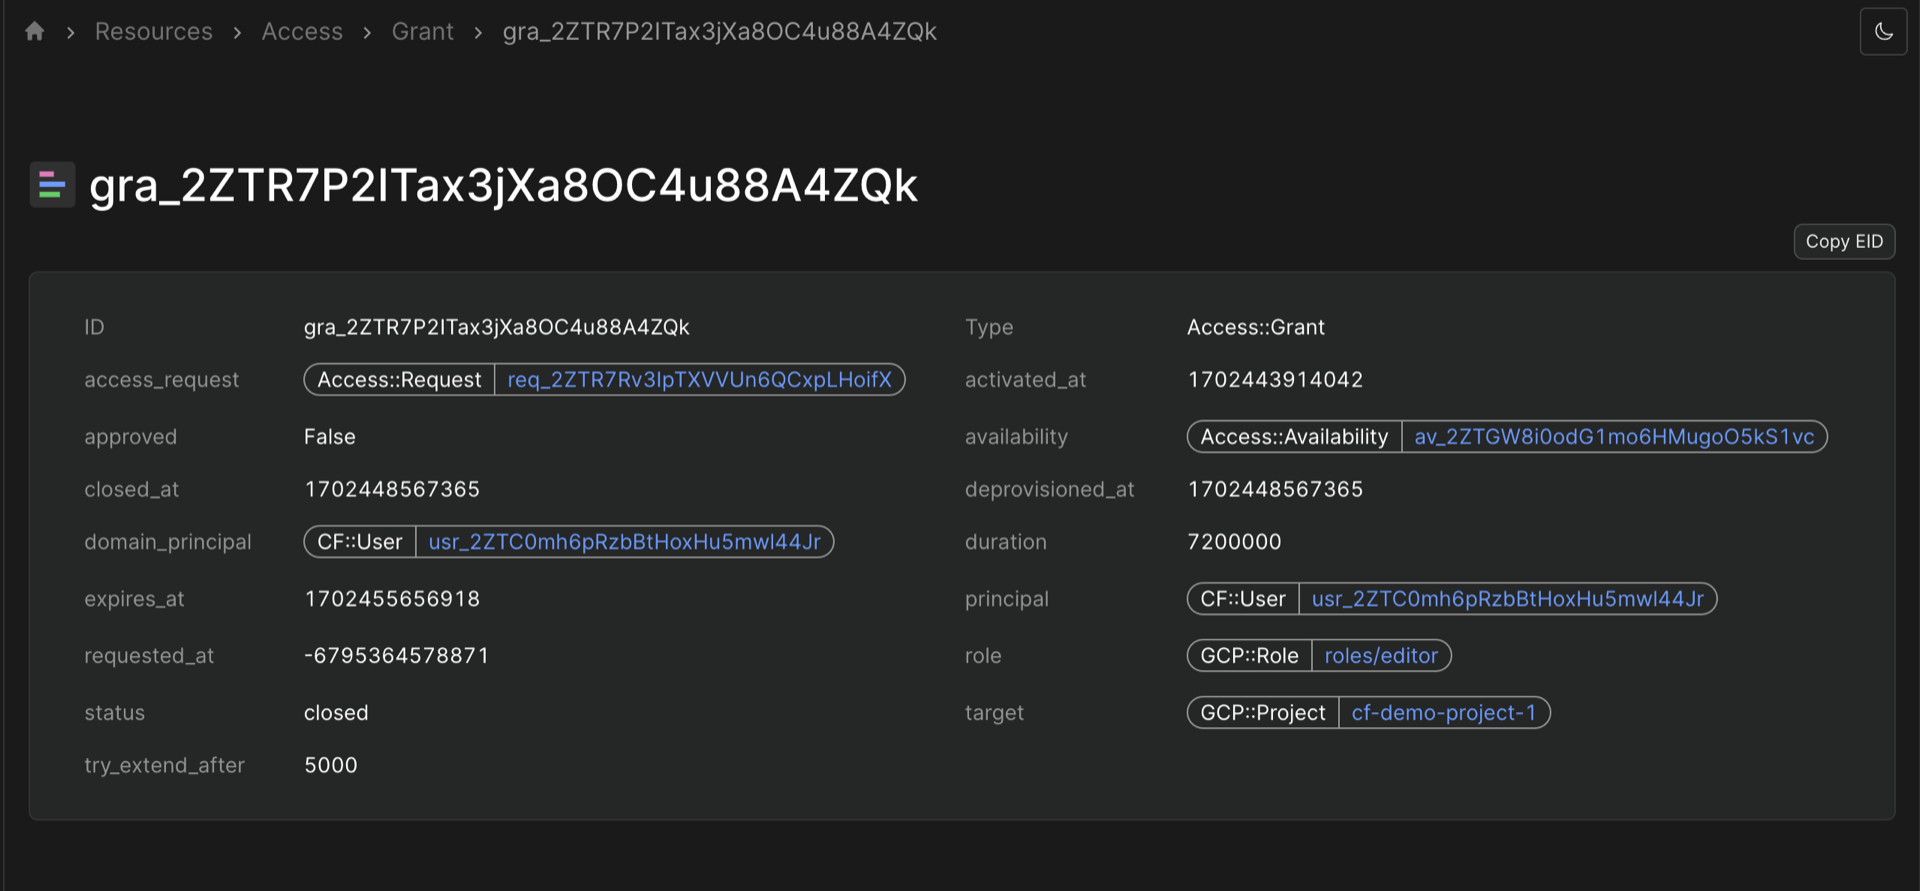
Grants represents temporary access to a particular target (the resource, like an AWS Account, GCP Project, or DataStax Organization) with a particular role (AWSAdministratorAccess, roles/owner or R/O User) and have an ID like Access::Grant::"gra_2ZTR7P2ITax3jXa8OC4u88A4ZQk". You can see the role and target amongst the other attributes in the screenshot below.
The following would work:
permit(
  principal in Entra::Group::"f6c381b5-aabb-4598-bec5-36e6e59bbb5c",
  action == Access::Action::"Approve",
  resource == Access::Grant::"gra_2ZTR7P2ITax3jXa8OC4u88A4ZQk"
);
The problem here though is that you’d need to write a policy like this for every requested Grant which is not scalable. Instead, we can use attributes like resource.role and resource.target. Cedar doesn’t allow these in the permit() or forbid() block, we have to use them in the when {} block instead. So we get a policy like this:
permit (
principal in Entra::Group::"f6c381b5-aabb-4598-bec5-36e6e59bbb5c", // CDS Team Entra Group
action == Access::Action::"Approve",
resource
) when { resource.role == DataStax::Role::"b73e44b2-b9e9-43b8-a7c1-c6a2fe2dab50" }
Another example, if you wanted to auto-approve access to a read-only role, you could use:
permit (
    principal in Entra::Group::"f6c381b5-aabb-4598-bec5-36e6e59bbb5c",
    action == Access::Action::"Activate",
    resource
) when { resource.role == AWS::IDC::PermissionSet::"id-of-read-only-role" }
If you wanted to restrict the policy to particular accounts, you could use:
permit (
principal in Entra::Group::"f6c381b5-aabb-4598-bec5-36e6e59bbb5c",
action == Access::Action::"Activate",
resource
) when { resource.role == AWS::IDC::PermissionSet::"id-of-read-only-role" && resource.target == AWS::Account::"123456789012" }
Here’s a reference from the Cedar docs on this we’d recommend too.
Base Policies Overview
Here are some basic policy examples are shown below to familiarise yourself with Cedar. During the deployment process we’ll provide you with tailored Cedar policies for your authorization use cases.
// Allow all users to request access to all resources
permit (
    principal,
    action == Access::Action::"Request",
    resource
);

// Allow manually approved Grants to be activated
permit (
    principal,
    action == Access::Action::"Activate",
    resource
)
when { resource.approved };

// Allow the Control Plane service to close any request in the request cleanup process
permit (
    principal == CF::Service::"ControlPlane",
    action == Access::Action::"Close",
    resource
);

// Allow users to close their own requests
@advice("Closing your own request is permitted")
permit (
    principal,
    action == Access::Action::"Close",
    resource
)
when { principal == resource.principal };

// Allow the security team to close anyone's requests
@advice("You can close any request because you are on the security team")
permit (
    principal in Entra::Group::"ID_OF_SECURITY_GROUP",
    action == Access::Action::"Close",
    resource
);

// Forbid users from approving their own access request
@advice("You cannot approve your own access request")
forbid (
    principal,
    action == Access::Action::"Approve",
    resource
)
when { principal == resource.principal };
Managing Request, Auto-Approve, and Approval Policies
Explore the flexibility of managing access requests, auto-approvals, and approval policies by modifying Cedar policies. Here are a few examples:
Auto-Approve Access Requests
To enable automatic approval, set the action for the resource to action == Access::Action::"Activate". The following policy is an example of enabling auto-approval for access requests targeting the GCP project within a Test folder:
// Auto-approve anyone in the test environment
@advice("Auto-approved because the access is to the test environment")
permit (
    principal,
    action == Access::Action::"Activate",
    resource in GCP::Folder::"folders/1046849679918" // Test Folder ID
);
Deny Access Request from Specific User
To deny access requests from a particular user, use the following policy:
@advice("You do not have the permissions to request access")
forbid(
  principal == Core::User::"usr_2ZDvUXOkW9VX9qSjupKLKxRypGN",
  action == Access::Action::"Request",
  resource
);
You can also match a user based on their email address:
@advice("You do not have the permissions to request access")
forbid (
  principal,
  action == Access::Action::"Request",
  resource
) when { principal.email == "user@example.com" }
This policy prevents the user from submitting access requests.
Extend Access
To allow access to be extended on a Grant, you can use the Access::Action::"Extend" action:
// Allow all users to extend access to any resource
// You can also specify resources for specific extend privileges
permit(principal, action == Access::Action::"Extend", resource);

// Alternatively, prevent extended access to specific resources
forbid(
  principal,
  action == Access::Action::"Extend",
  resource in GCP::Folder::"folders/1046849679918"
);
Auto-approval for on-call users
You can set auto-approval for on-call users from PagerDuty and OpsGenie. Below is an example of automatically approving access for on-call responders in PagerDuty:
// Automatically approve access for on-call responders in Pager Duty
@advice("Auto-approved because you are on-call")
permit (
    principal in
        PagerDuty::OnCall::"PNE4HSJ", // Repeat this policy for each schedule
    action == Access::Action::"Activate",
    resource
);
Deploying Authorization Policies to Terraform
You can organize the authorization policies in different files, such as policies/demo.cedar, and apply them using Terraform in a file named policies.tf:
resource "commonfate_policyset" "demo" {
  id   = "demo"
  text = file("policies/demo.cedar")
}

resource "commonfate_policyset" "oncall" {
  id   = "oncall"
  text = file("policies/oncall.cedar")
}
After applying the changes to Terraform, you should see CF::PolicySet appear in your Resources tab in the web UI.