Assuming roles
First time setup
The first time you run assume, you’ll be prompted to choose Firefox or your default browser for Granted to use when opening web consoles for your roles. You should see a prompt similar to the one below.
- Granted searches your PATH and checks common install locations to determine your current default browser. If that’s not the browser you want to use you can still specify another at a later stage in the first time setup.
➜ assume[i] Thanks for using Granted![i] By default, Granted will open the AWS console with this browser: Chrome[!] Granted works best with Firefox but also supports Chrome, Brave, and Edge (https://docs.commonfate.io/granted/introduction#supported-browsers). You can change this setting later by running 'granted browser set'
? Use Firefox as default Granted browser? (y/N)
If you select Firefox, you’ll be prompted to install the Granted Firefox addon. Follow the steps in the wizard and then rerun assume.
The second time you run assume, you will be prompted to set up a shell alias. You should see a prompt similar to the one below. The prompt may be slightly different depending on the shell that you are using.
➜ assume
ℹ️ To assume roles with Granted, we need to add an alias to your shell profile (https://docs.commonfate.io/granted/internals/shell-alias).? Install zsh alias at /Users/<username>/.zshenv Yes
Added the Granted alias to /Users/<username>/.zshenv
Shell restart required to apply changes: please open a new terminal window and re-run your command.
Restart your shell by opening a new terminal window. The first-time setup for Granted is now complete.
Using the role selector
After completing the first-time setup, run assume again. You should see a list of installed roles similar to below:
➜ assume
? Please select the profile you would like to assume: [Use arrows to move, type to filter]> role-a role-b role-cYou can search for a role by name by typing on your keyboard. Select a role using the arrow keys and press Enter to assume it. If the role uses AWS SSO, you will be prompted to log in through your browser.
You should then see an output similar to below:
[role-a] session credentials will expire 2022-02-21 16:36:20 +0000 GMTYou can use the AWS STS Get Caller Identity API to verify that you have assumed the role. Run the below command from the same terminal window that you called assume from. You should see an output similar to below, with the UserId, Account, and ARN fields matching your role’s configuration.
➜ aws sts get-caller-identity{ "UserId": "ABCDEFGHIJKLM:me@company.com", "Account": "123456789012", "Arn": "arn:aws:sts::123456789012:assumed-role/my-role/session-name"}Assuming a role by name
To avoid needing to open the role selector, you can specify the name of the profile as an argument by running assume <PROFILE_NAME>:
➜ assume role-a
[role-a] session credentials will expire 2022-02-21 16:47:33 +0000 GMT
Overriding duration
With Granted you can specify the --duration or -d flag to set the temporary credentials duration. Note that this will have to be within the default maximum duration set on the role when the role was created.
➜ assume role-a -d 3h
[role-a] session credentials will expire 2022-02-21 16:47:33 +0000 GMT
Using a third party credential provider
Granted supports using third party CLIs to obtain AWS credentials.
Here is the current list of providers that work with Granted:
- AWS SSO
- IAM
- aws-azure-login
- aws-google-auth
- Specifying a credential-process in your config
We are looking to add more to this list in the future. Contributions for additional credential providers are most welcome. If you’re looking for a model example in our source code, assumer_aws_azure_login.go is a good starting point.
Pass-through flags
If you’re using a custom SSO credential provider like aws-azure-login or aws-google-auth, Granted allows you to pass through flags to run custom procedures using those providers.
Using the -pt or --pass-through flag will allow you to pipe commands into that internal command.
For example:
assume role-a -pt --no-promptunder the hood will run :
aws-azure-login —profile role-a —no-promptKeychain prompt
When using Granted on MacOS you will receive a keychain access prompt similar to the one below. This occurs when Granted uses cached AWS SSO credentials to assume roles.
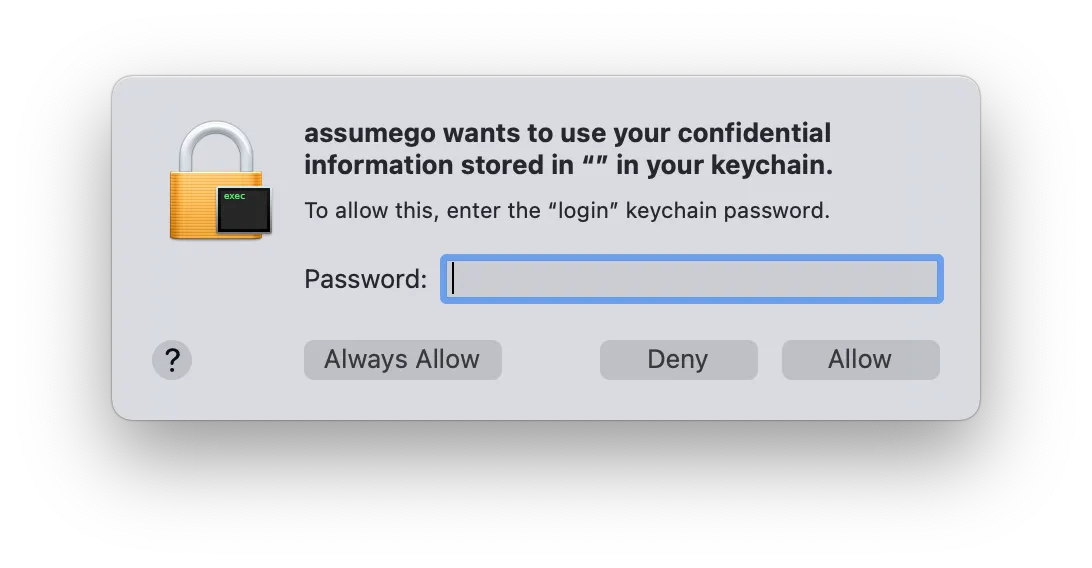
This is expected as Granted stores the AWS SSO credentials in your keychain. The binary name which you see in this prompt should always be assumego.
Next steps
In addition to assuming roles for use in the terminal, Granted allows you to open multiple cloud accounts in your web browser simultaneously. Next, you’ll learn how to use Granted with your web browser.